Having made good progress on clearing my lead pile of WWII ships I was rewarded with the arrival in mid January of another order from Navwar. As a result my naval shipyards were replenished. Being summer here my painting time is somewhat reduced. As a result I opted to complete some small naval projects.
First out of the naval yards was the Admiral Graf Spee. The Navwar model is crisp and well detailed and an absolute bargain at the price of just 1.35 pound sterling, excluding postage. Well to be honest all the Navwar models are a great value. The Royal Navy squadron opposing the Graf Spee at the Battle of the River Plate was finished last year. They now await deployment to the table for what is, without doubt, a classic action. A few photos of the Graf Spee, as well as the Royal Navy squadron, can be found here.
Next out of the naval yards were the first elements of the Royal Navy’s Far Eastern squadron. Forming Force Z was a direct result of one of my regular opponents forming his own Japanese squadron. Hopefully the arrival of Force Z will counter the imminent deployment of the Imperial Japanese Navy, though only time will tell. A few photos of Force Z can be found here. A pleasing beginning to my painting projects of 2023.
Since first publishing this article we have refought the Battle of the River Plate. A description of the engagement can be found here.
A final push on the painting front has completed the initial batch of models for the planned naval actions in the Mediterranean during World War II. My main focus has centred around the models required for the Battle of Cape Matapan. Though, as mentioned previously, they have been supplemented by some additional ships to provide some variety especially in fictional encounters.
In total my Royal Navy contingent comprises some four battleships, one battle cruiser, two heavy cruisers, five light cruisers and 13 destroyers. The Regia Marina in contrast comprises four battleships, six heavy cruisers, two light cruisers and 17 destroyers. Considering I had no WWII vessels a few moths ago I feel a degree of satisfaction with the painting progress.
I must say I’ve really enjoyed the experience. The Navwar models are pleasing to paint with a good degree of detail. While I understand some people don’t use washes on naval models I feel mine have benefited from a wash, especially after some experimentation with density. The basing was something of an experiment, but I feel it lifts the models.
I have also completed the first few splash markers which, while also being needed for the rules, add some further visual interest. I next will attempt some further splash markers along with some markers to denote fires, though how these will be made requires some thought.
Finally, to support my naval adventures I have also started a small blog which will have a naval focus. If you are interested you can find it here. Currently it illustrates a number of the miniatures completed. In time I expect to expand it with other material. If naval wargaming is of interest do visit from time to time, or consider following the blog.
I now await the arrival of the next batch of models from Navwar. Hopefully they won’t be too long…
Friday evening provided an opportunity to head to the Mediterranean for a WWII Naval encounter using 1/3000th miniatures and the Naval Thunder rules. As with many battles in the Mediterranean they were frequently a result of convoy movements. The Italians frequently moving north to south while the British east to west. This fictional action involves two convoy covering forces engaged south-east of Malta in November 1940.
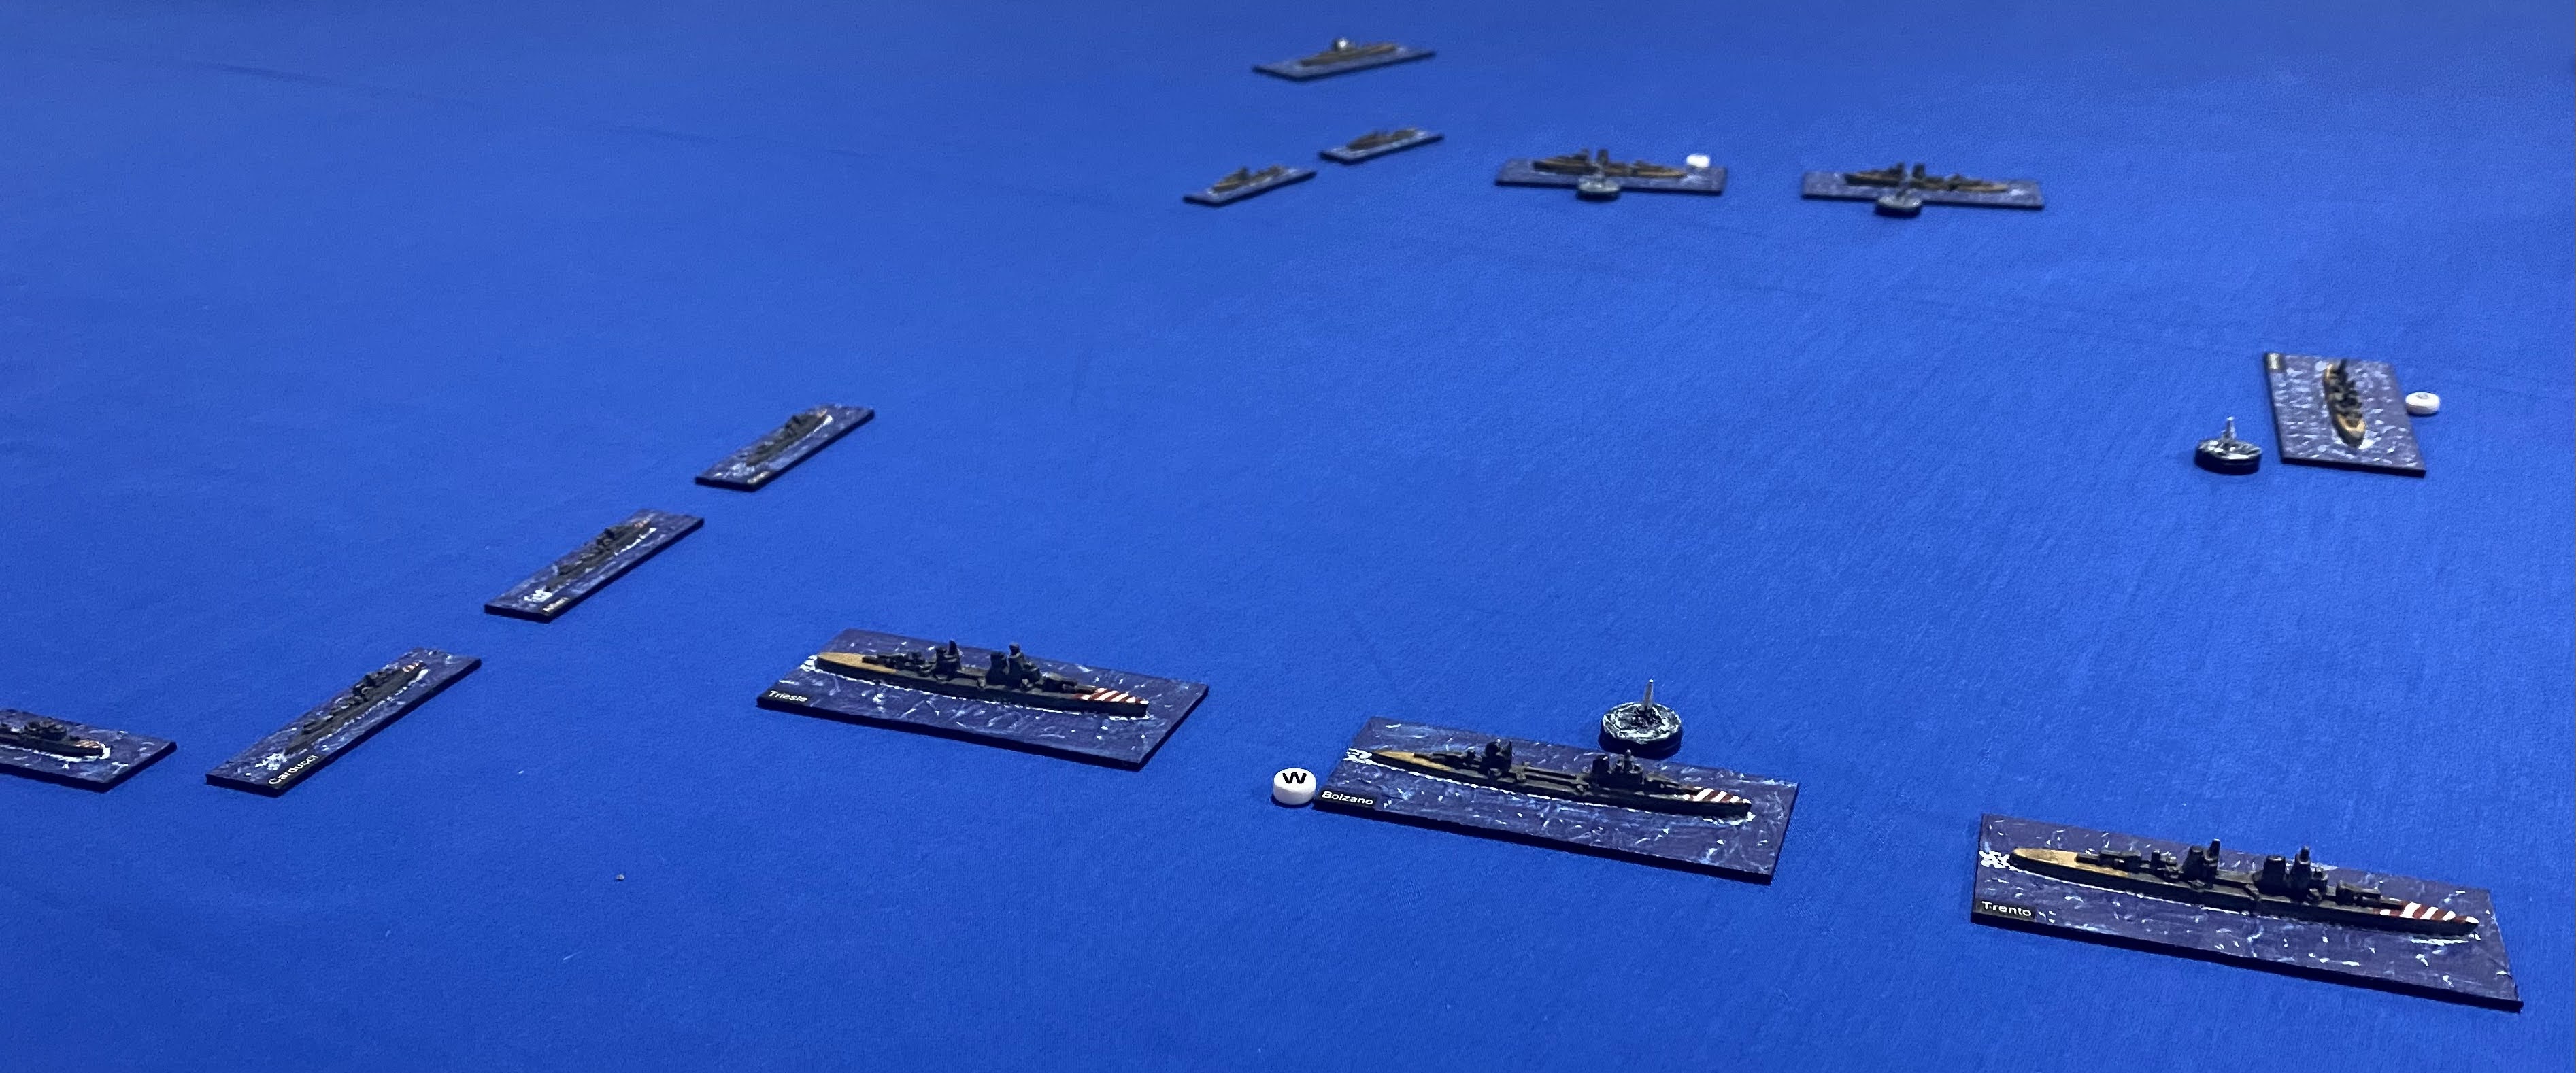
The Italian covering force was under command of Vice Admiral Luigi Sansonetti and was centred around three heavy cruisers. Specifically the Trento, Bolzano and Trieste all from the 3rd Cruiser Division. The cruisers were supported by the four destroyers of 9th Destroyer Squadron, the Alfredo Oriano, Vincenzo Gioberti, Vittorio Alfieri and Giosue Carducci. In the afternoon of 13th of November Sansonetti’s force held a generally southern course with the destroyers and cruisers formed in two columns with the destroyers starboard of his heavy cruisers. Below the Italians moving south. This image is taken when the Trento has come under fire from three British cruisers.
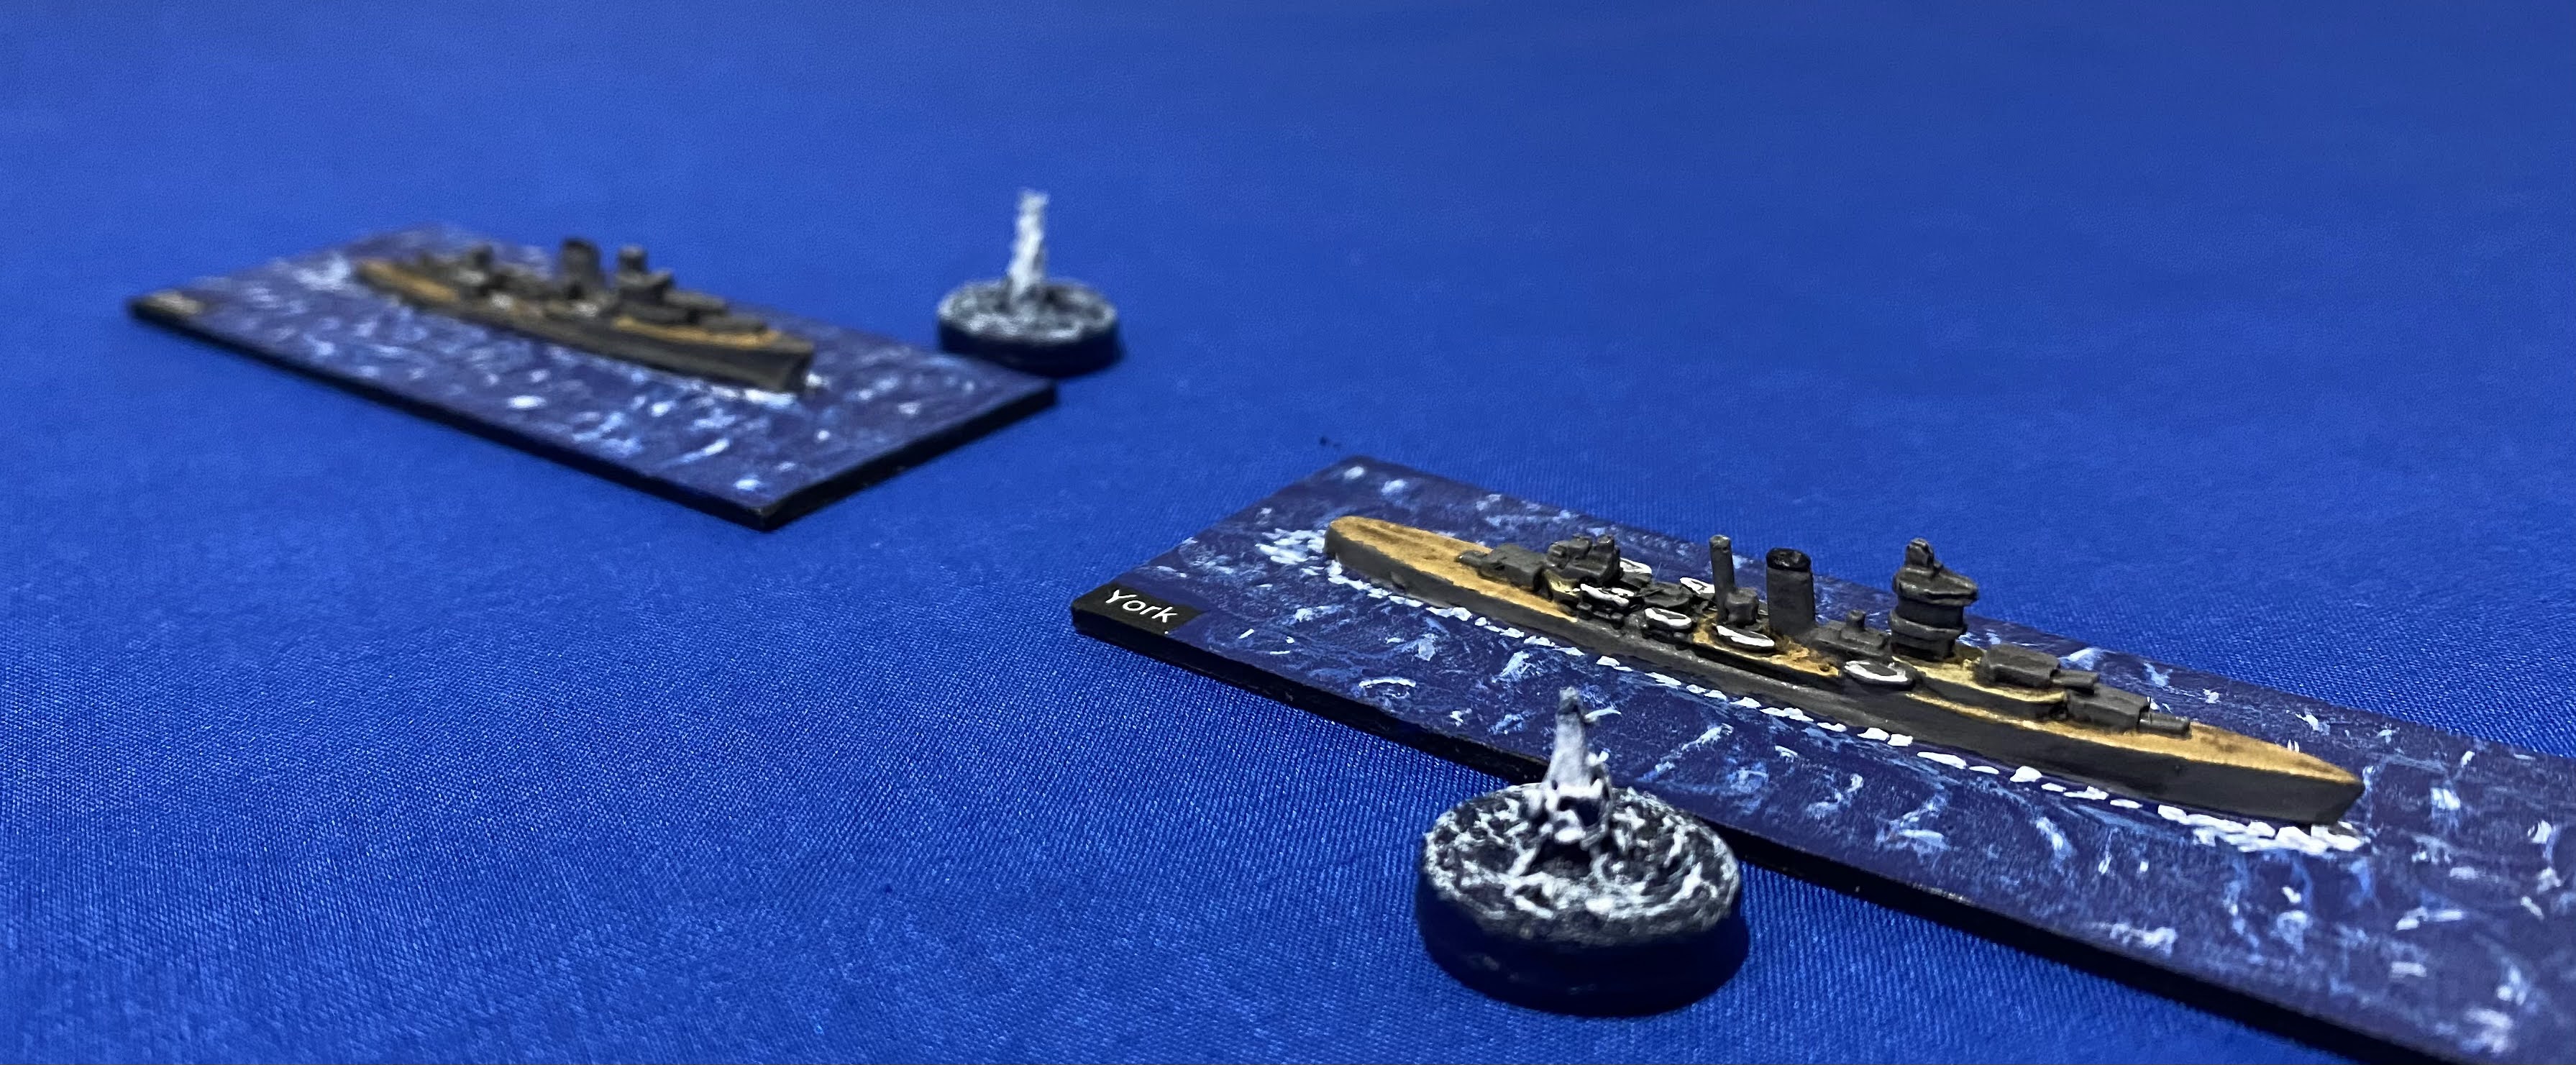
To the south, and moving north, was Vice Admiral Algernon Melchett his flag on the only heavy cruiser currently in the Mediterranean, HMS York. Now, it must be said from the start that Melchett was something of an unknown quality. Without doubt his family connections influenced his appointments. Yet today his skills would be put to the test.
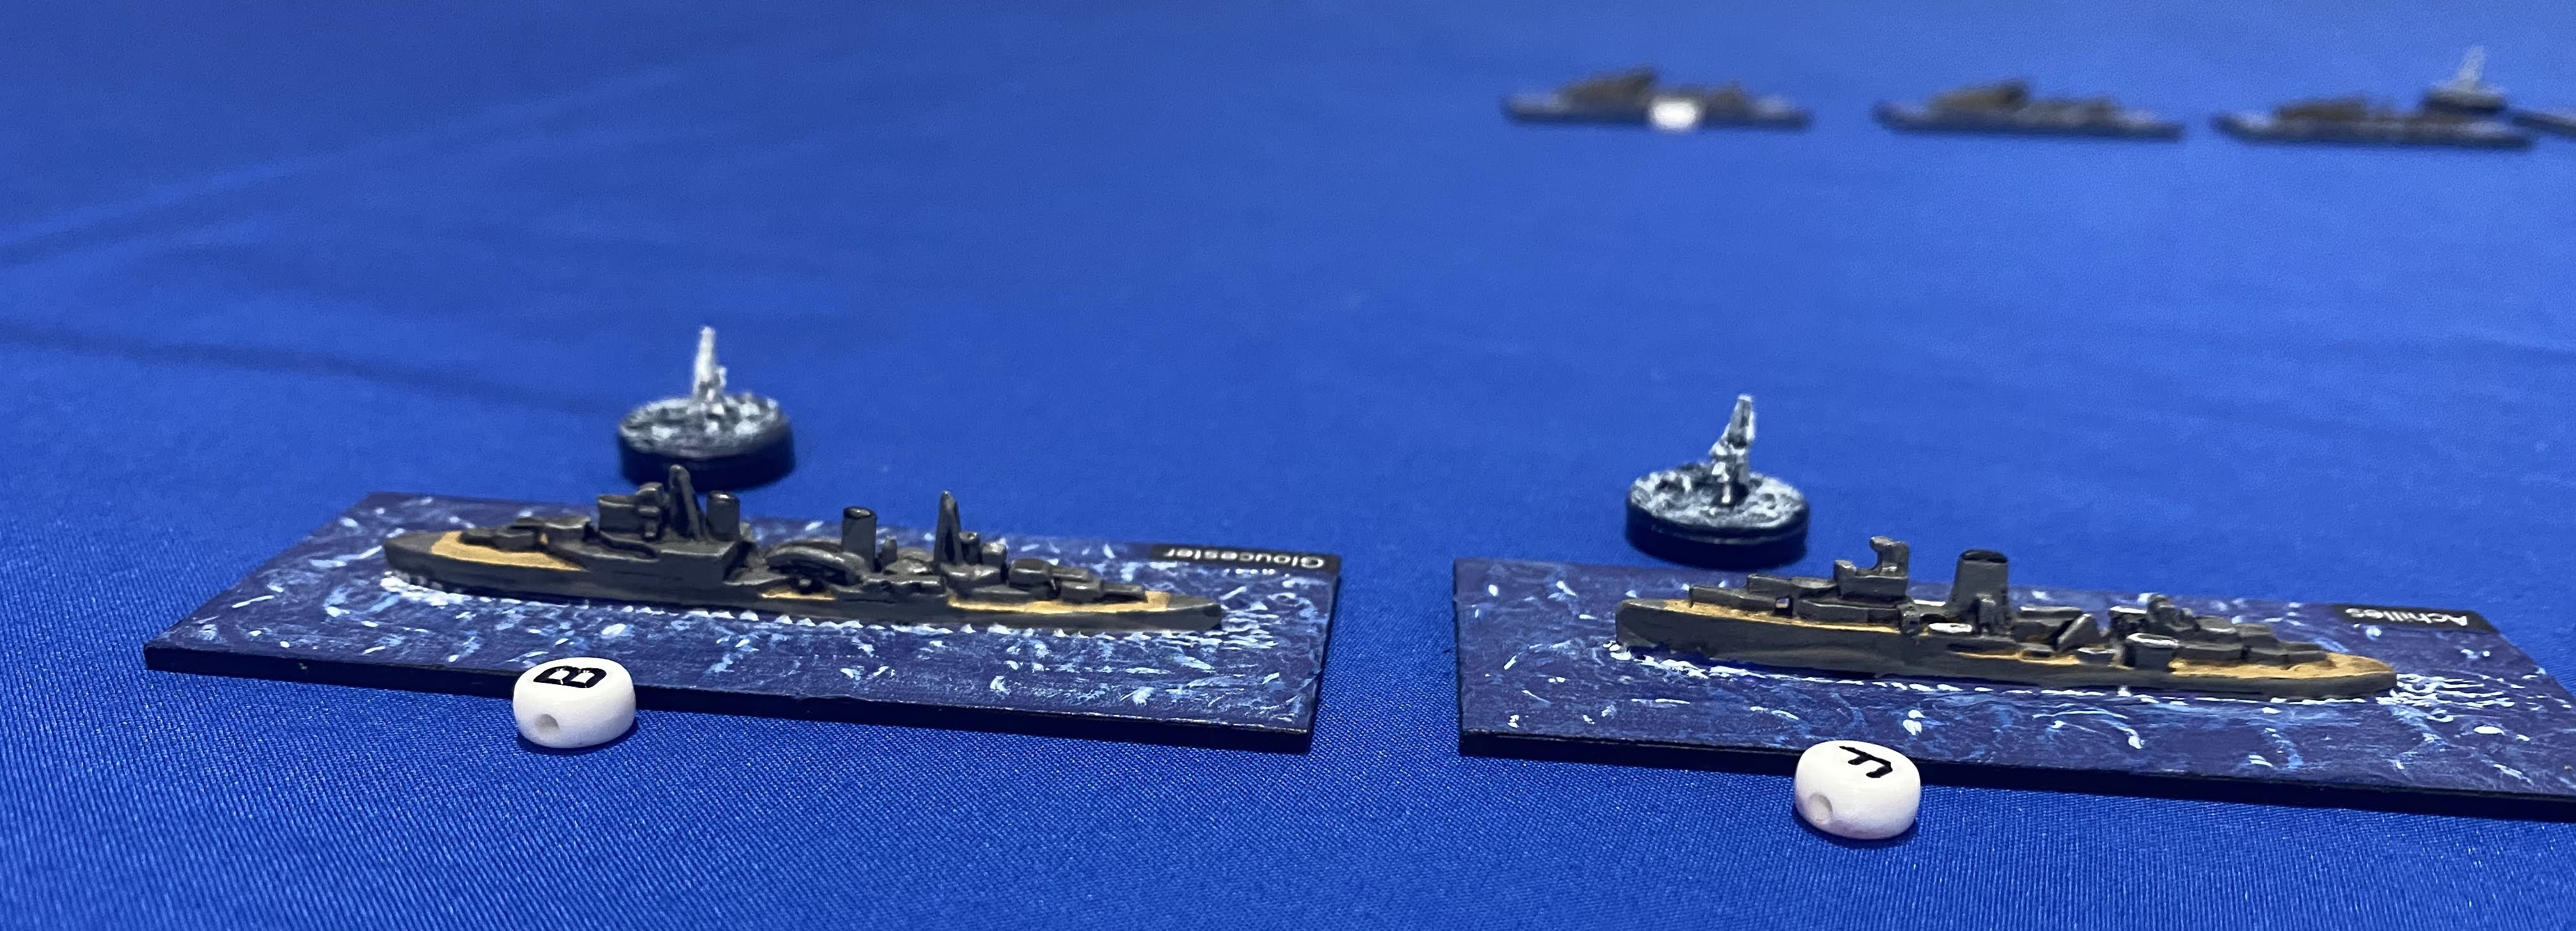
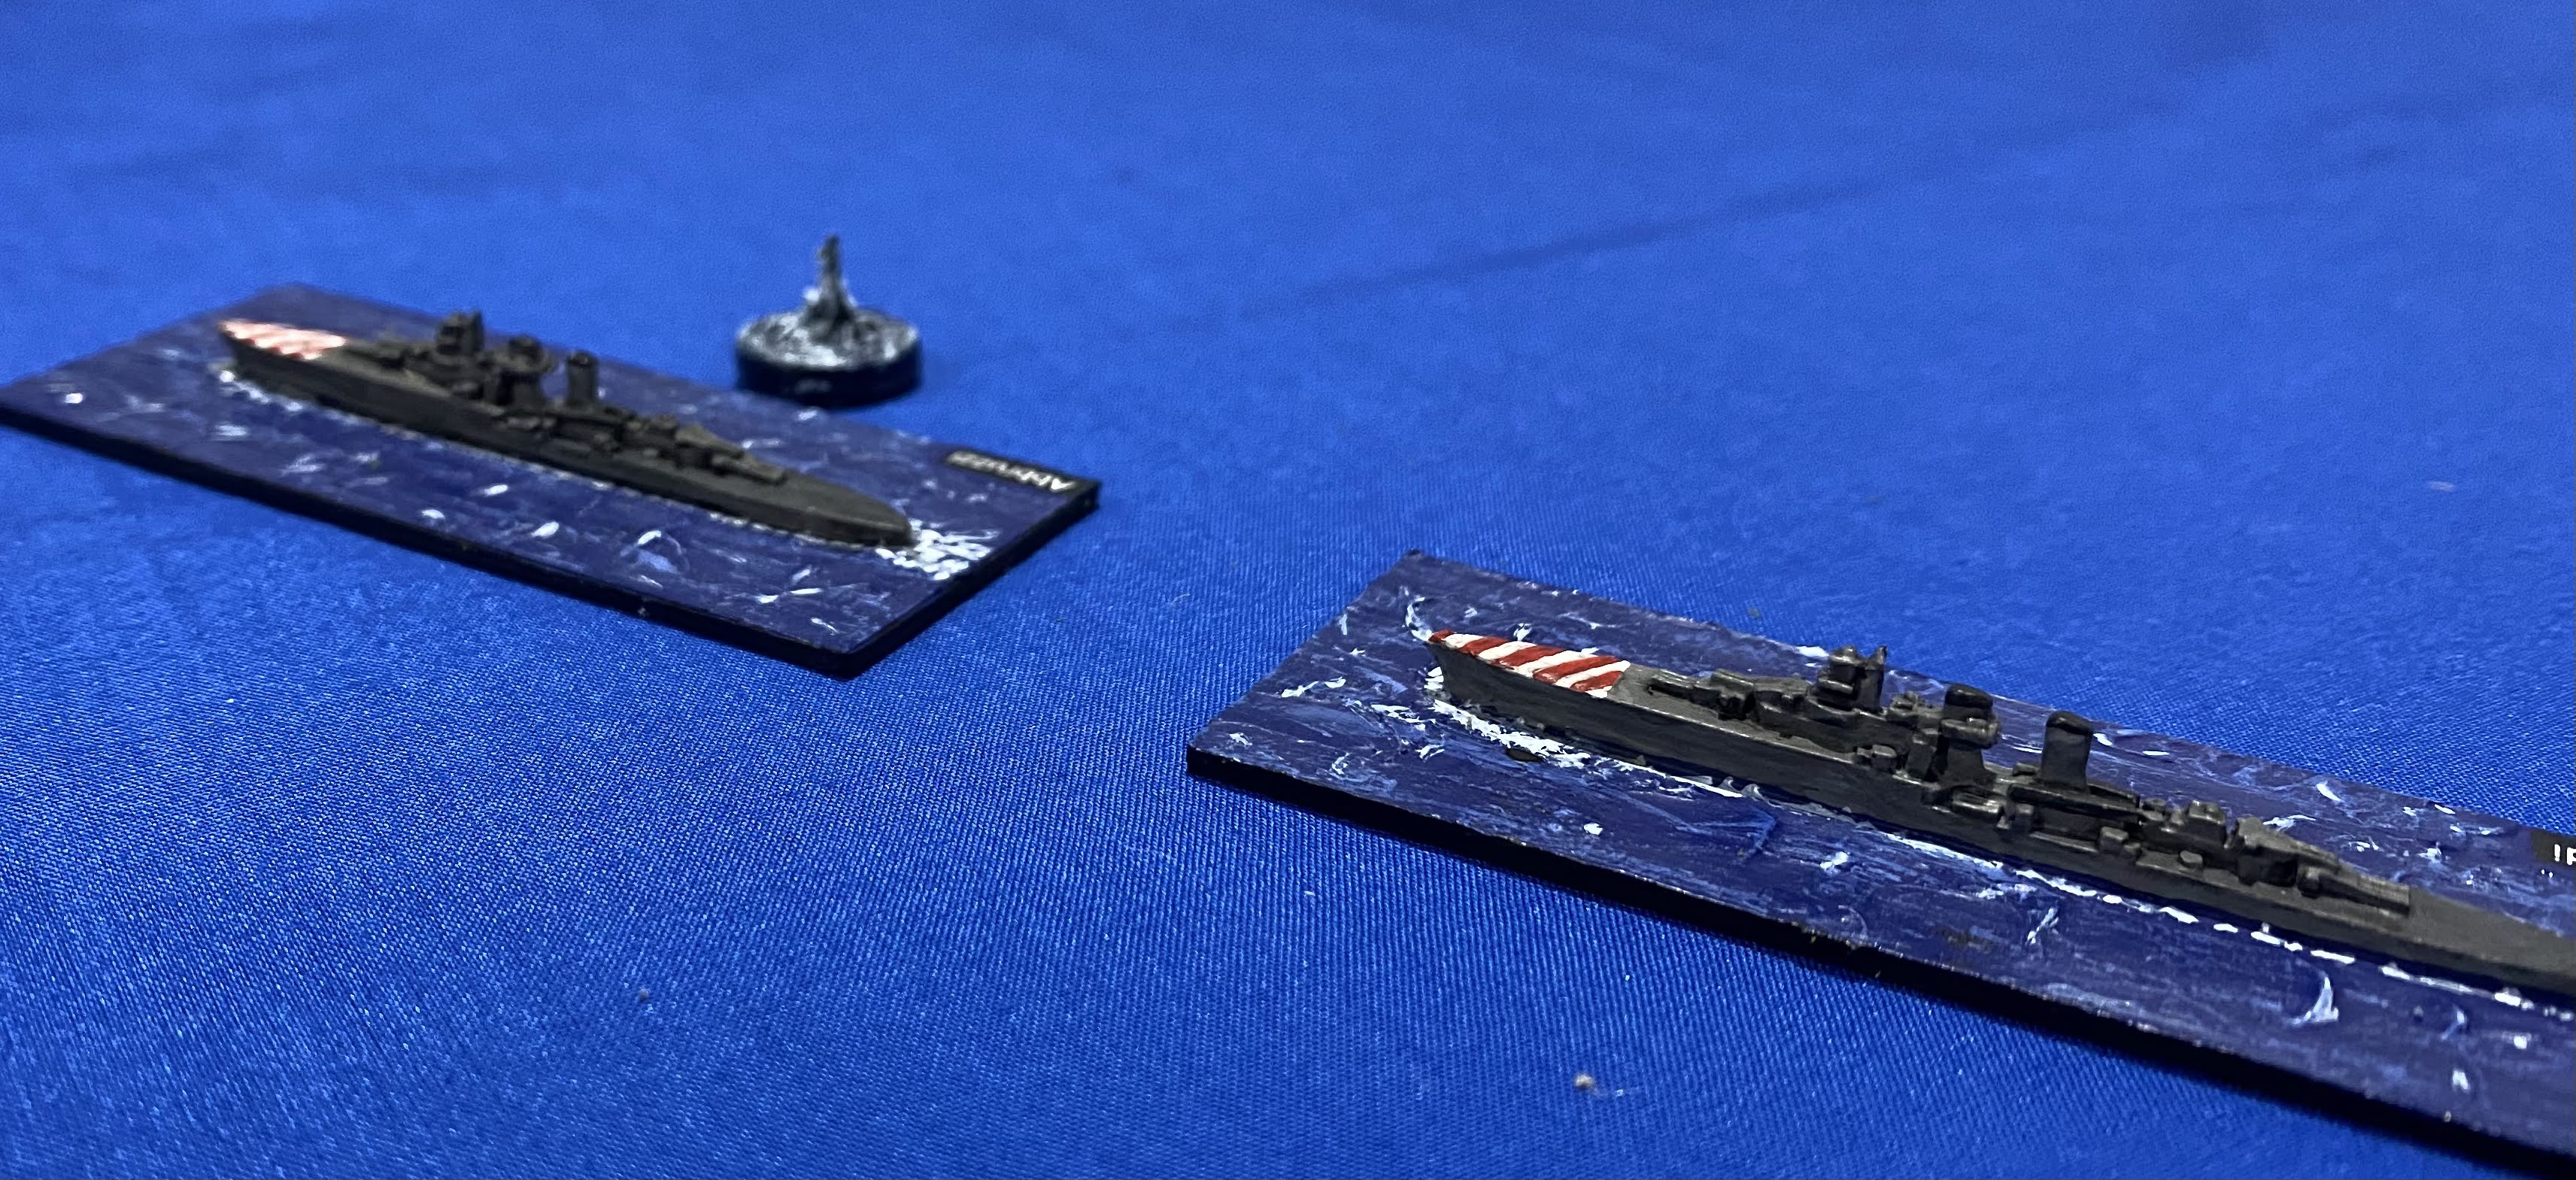
Alerted to the enemy to the north-west the Melchett prepared to engage the enemy. He had at his disposal four cruisers. These were the heavy cruiser HMS York, as previously mentioned, reinforced by the light cruisers HMS Gloucester, Achilles and Orion, all armed with 6″ guns. Melchett’s destroyer escort comprised three destroyers, HMS Jervis, Janus and Mohawk. Melchett’s genius was in overdrive and he determined to execute what can be only described as a “cunning plan”.
His force would be organised in three groups. The first group comprised the light cruisers. With Gloucester leading the three light cruisers would set a westerly course with the aim of concentrating their fire on Trento, the lead Italian cruiser, and ideally secure a position that limited the ability of the Italian cruisers from bringing their own full broadsides into action. Further, Melchett determined that in a close range engagement the mass of 6″ guns would overwhelm a single enemy 8″ cruiser. The second group comprised the British destroyers. These ships would press the enemy and likely engage the enemy destroyers. Finally, HMS York would hold her range and engage targets making the best use of her long range fire and British radar. As the British ships divided into their various groups Melchett was comfortable that his plan would bring success. It was after all his most cunning plan since his last game of bridge at the Officers Club in Alexandria four weeks ago.
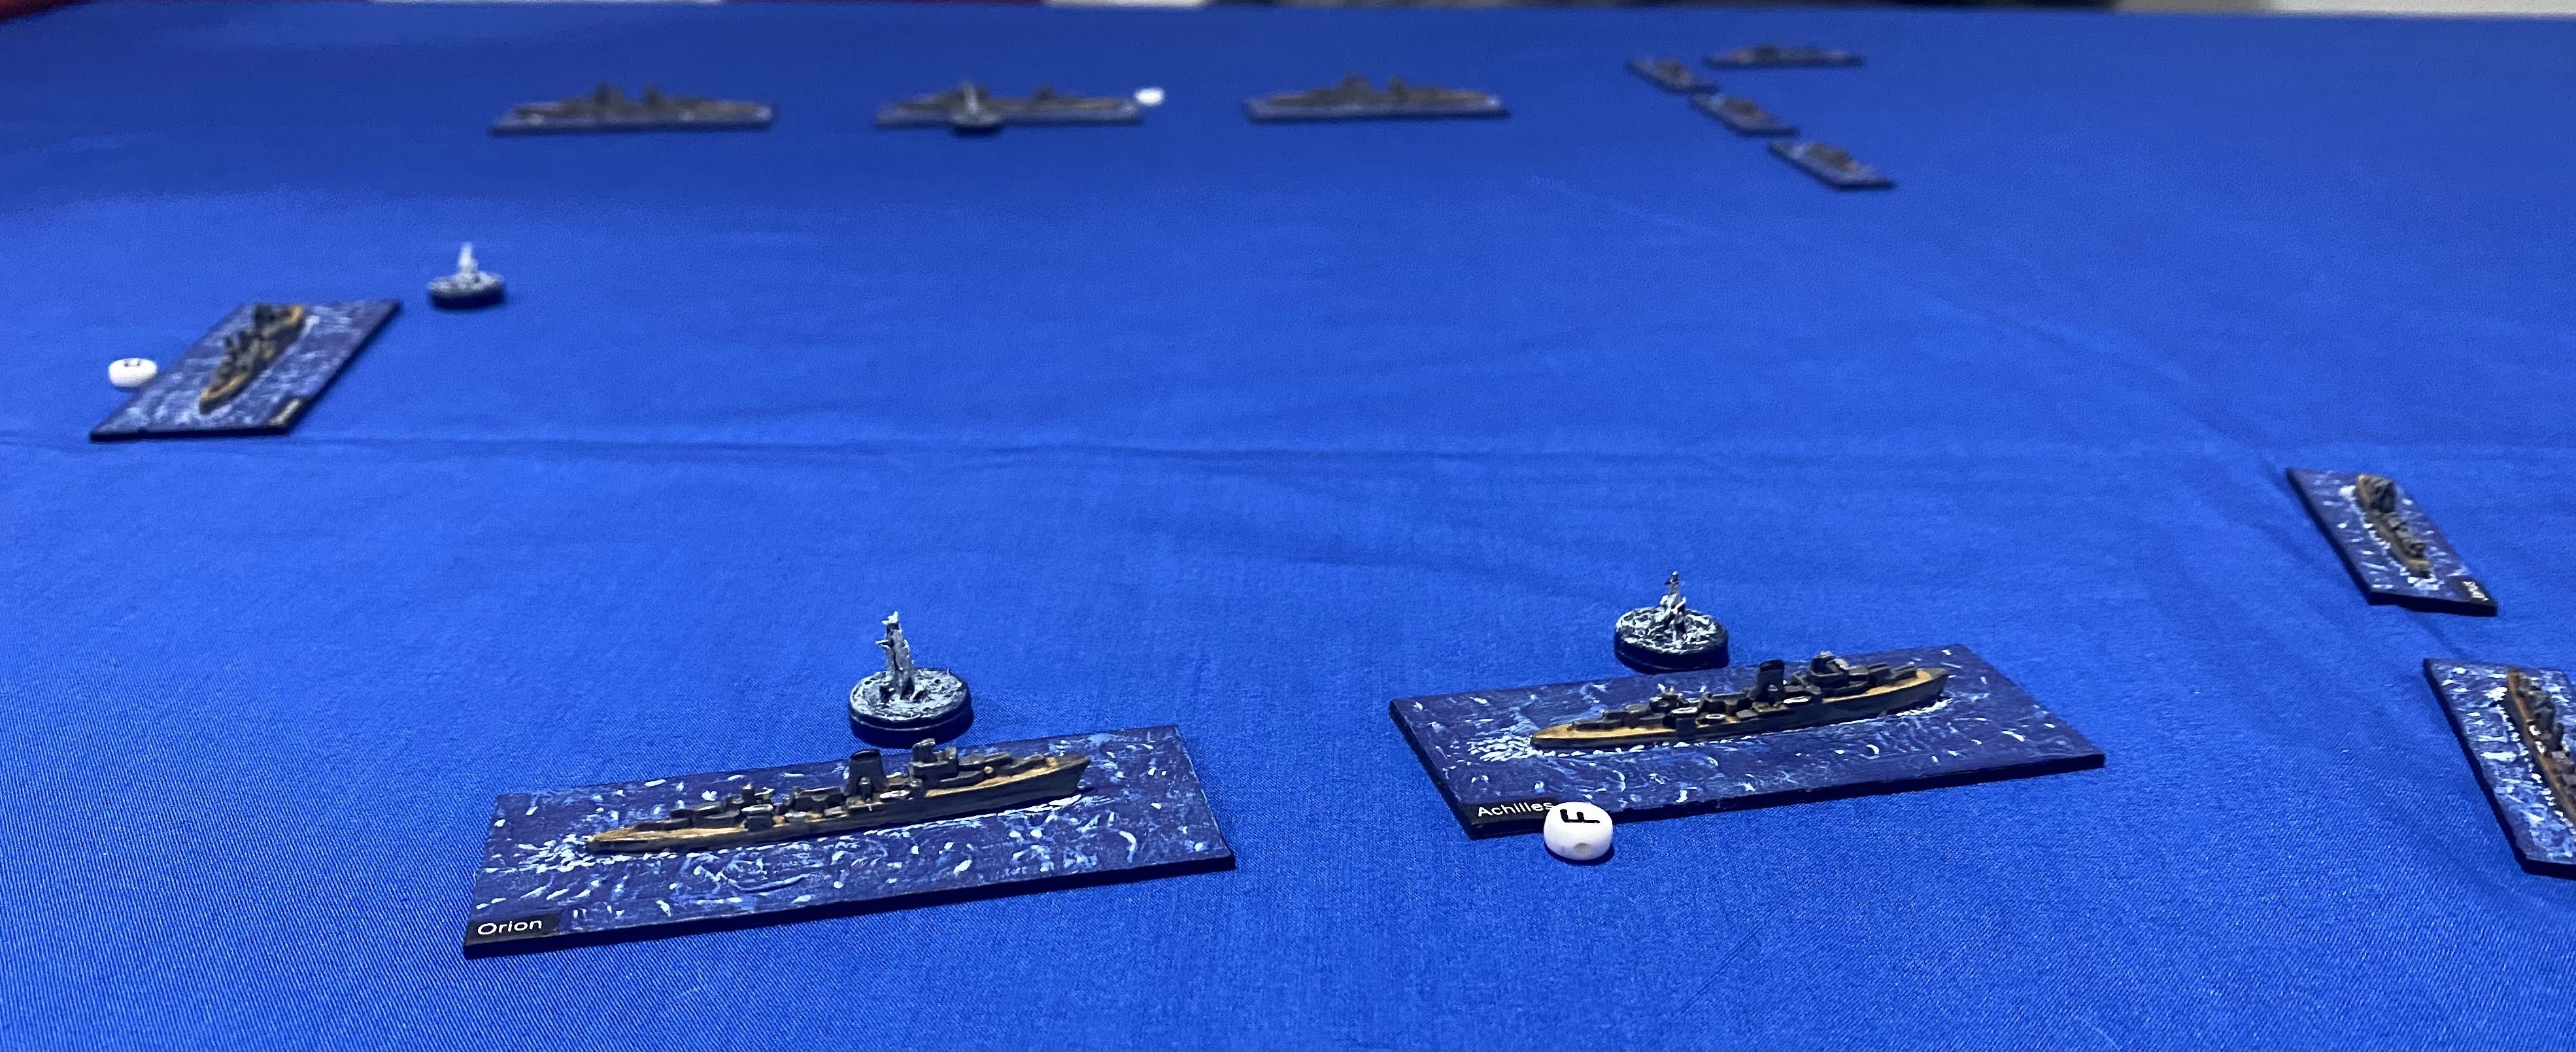
Below, the three groups are visible with HMS York in the bottom right and the light cruisers on the left as the begin to move west.
No sooner had the ships begun to execute their orders the sea around HMS Gloucester, Orion and York erupted with splashes as the Italian heavy cruisers began to engage, with one Italian heavy cruisier engaging each. This in itself was not unexpected, however the Italian fire seemed today to be more effective than expected.
Despite this unnerving accuracy HMS Gloucester pressed forward concentrating her fire on Trento. Simultaneously, and as planned, Achilles and Orion tried to mass their own fire on Trento. However, increasingly this would become problematic – due to the speed of the Italians. Soon only the forward guns of all the light cruisers could engage Trento. The aft turrets, and starboard secondary weapons, were forced to target Bolzano and Trieste. Gloucester was now under heavy fire and would soon loose both her forward firing turrets.
Above, HMS Gloucester and HMS Achilles, part of the Royal Navy’s New Zealand Division, under fire. Gloucester has taken a hit to her bridge and Achilles is suffering fire, which she would soon bring under control.
When matters seemed like they could not get worse HMS York lost a forward turret reducing her small broadside from six 8″ guns to just four.
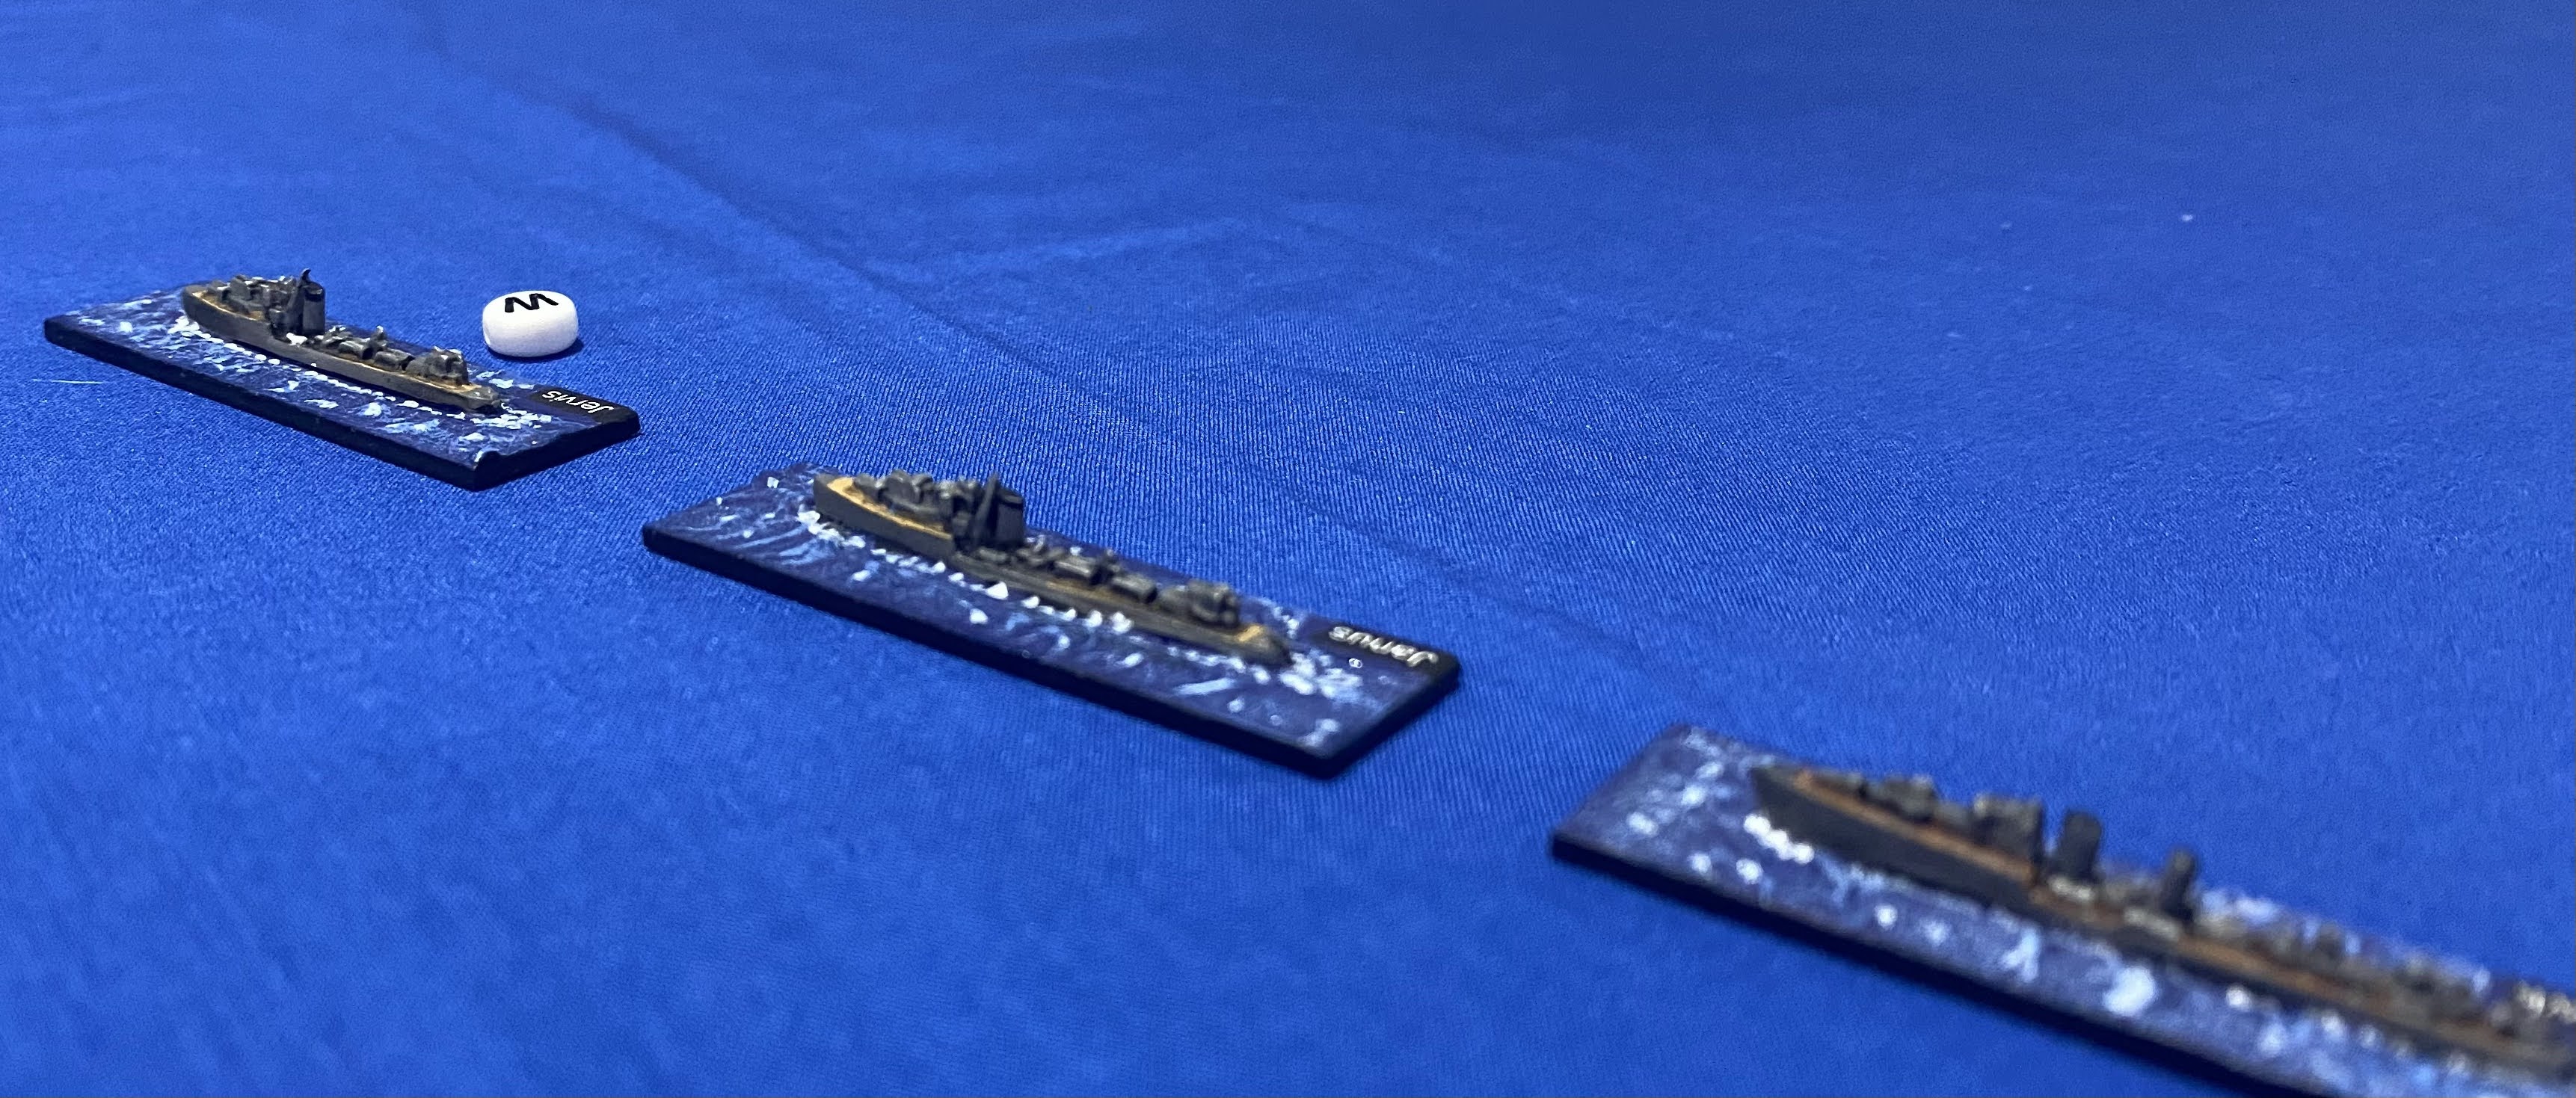
Melchett was by now becoming nervous and signalled to his destroyers “Engage enemy with all haste”. The three destroyers moved quickly west towards the Italian heavy cruisers, with HMS Jervis leading the destroyers forward. Once they had closed range they would turn to port and deliver a deadly torpedo attack.
Above, the British destroyers move forward. Below, a general view of the engagement. In this photo the splash markers denote ships under fire from enemy 8″ armed cruisers.
Below, Trento under fire from HMS York. As described previously the Italian cruisers were under fire by 6″ gunned cruisers but these are not denoted with splash markers.
With Gloucester now heavily damaged, and the Italians gaining the initiative, Gloucester’s captain signalled York – “Italian gunnery effective, taking heavy fire”. Melchett allegedly now signalled “Act independently, you can’t hash this up more than me”.
The wording of this signal was later to be denied by Melchett, who would state the signal was noted down incorrectly by a junior lieutenant. Whatever the intended signal HMS Achilles and Orion turned to starboard and formed a gun line while Gloucester fired her torpedoes in a last desperate attack before going down.
Elsewhere the Italian destroyers were finally were committed. Setting a course that would take them directly towards the British destroyers the line of Italian destroyers cut an impressive scene as the cut through the water at speed.
Above, the general situation with HMS Orion and Achilles exchanging fire with two Italian heavy cruisers. The crew of Achilles now is fighting a further fire, as denoted by the marker. Below, the view from the Italian perspective. The Bolzano is battling flooding and is under 8” fire from HMS York.
While the Italian cruisers engaged the British cruisers with their main armament the British destroyers were engaged with their secondary batteries. The Bolzano and Trieste each had three twin 3.9″ turrets and while some turrets were knocked out, especially on the Bolzano, those operational concentrated fire on the HMS Jervis and then Janus sinking both in short order.
However, Bolzano and Trieste were now struggling with a combination of fires and floods. The floods on Bolzano were becoming problematic and soon she was suffering a severe list and unable to make even half speed. Trieste’s flooding was more contained and while she could make good speed she was heavily damaged. One further salvo from York and she would likely sink, assuming the fires and floods did not. Yet Trieste guns remained operational. Soon her secondary weapons, now supported by the destroyer Oriani, dispatched a further British destroyer, HMS Mohawk. Around the same time HMS Achilles was lost.
Realising the engagement was over Melchett ordered his surviving vessels to break off. HMS Orion made smoke and both she and HMS York set a course to the east. Melchett of course knew he would soon have an appointment with the Royal Navy Board of Inquiry. It was without doubt a glorious day for the Regia Marina.
As noted above we are using 1/3000th miniatures which are all from Navwar’s range. They are from my own collection with the Italian heavy cruisers being only recent reinforcements. This game involved four players and was, for two of us, only our second game using “Naval Thunder Battleship Row”.
Friday evening provided an opportunity to deploy a selection of my recently painted Italian and British 1/3000th ships for their first game. In addition it would be our first use of the rules “Naval Thunder Battleship Row”. As such we were keen to keep the game small and use basic weapon systems, a small cruiser action therefore seemed ideal. The following provides a brief description along with a few photos.
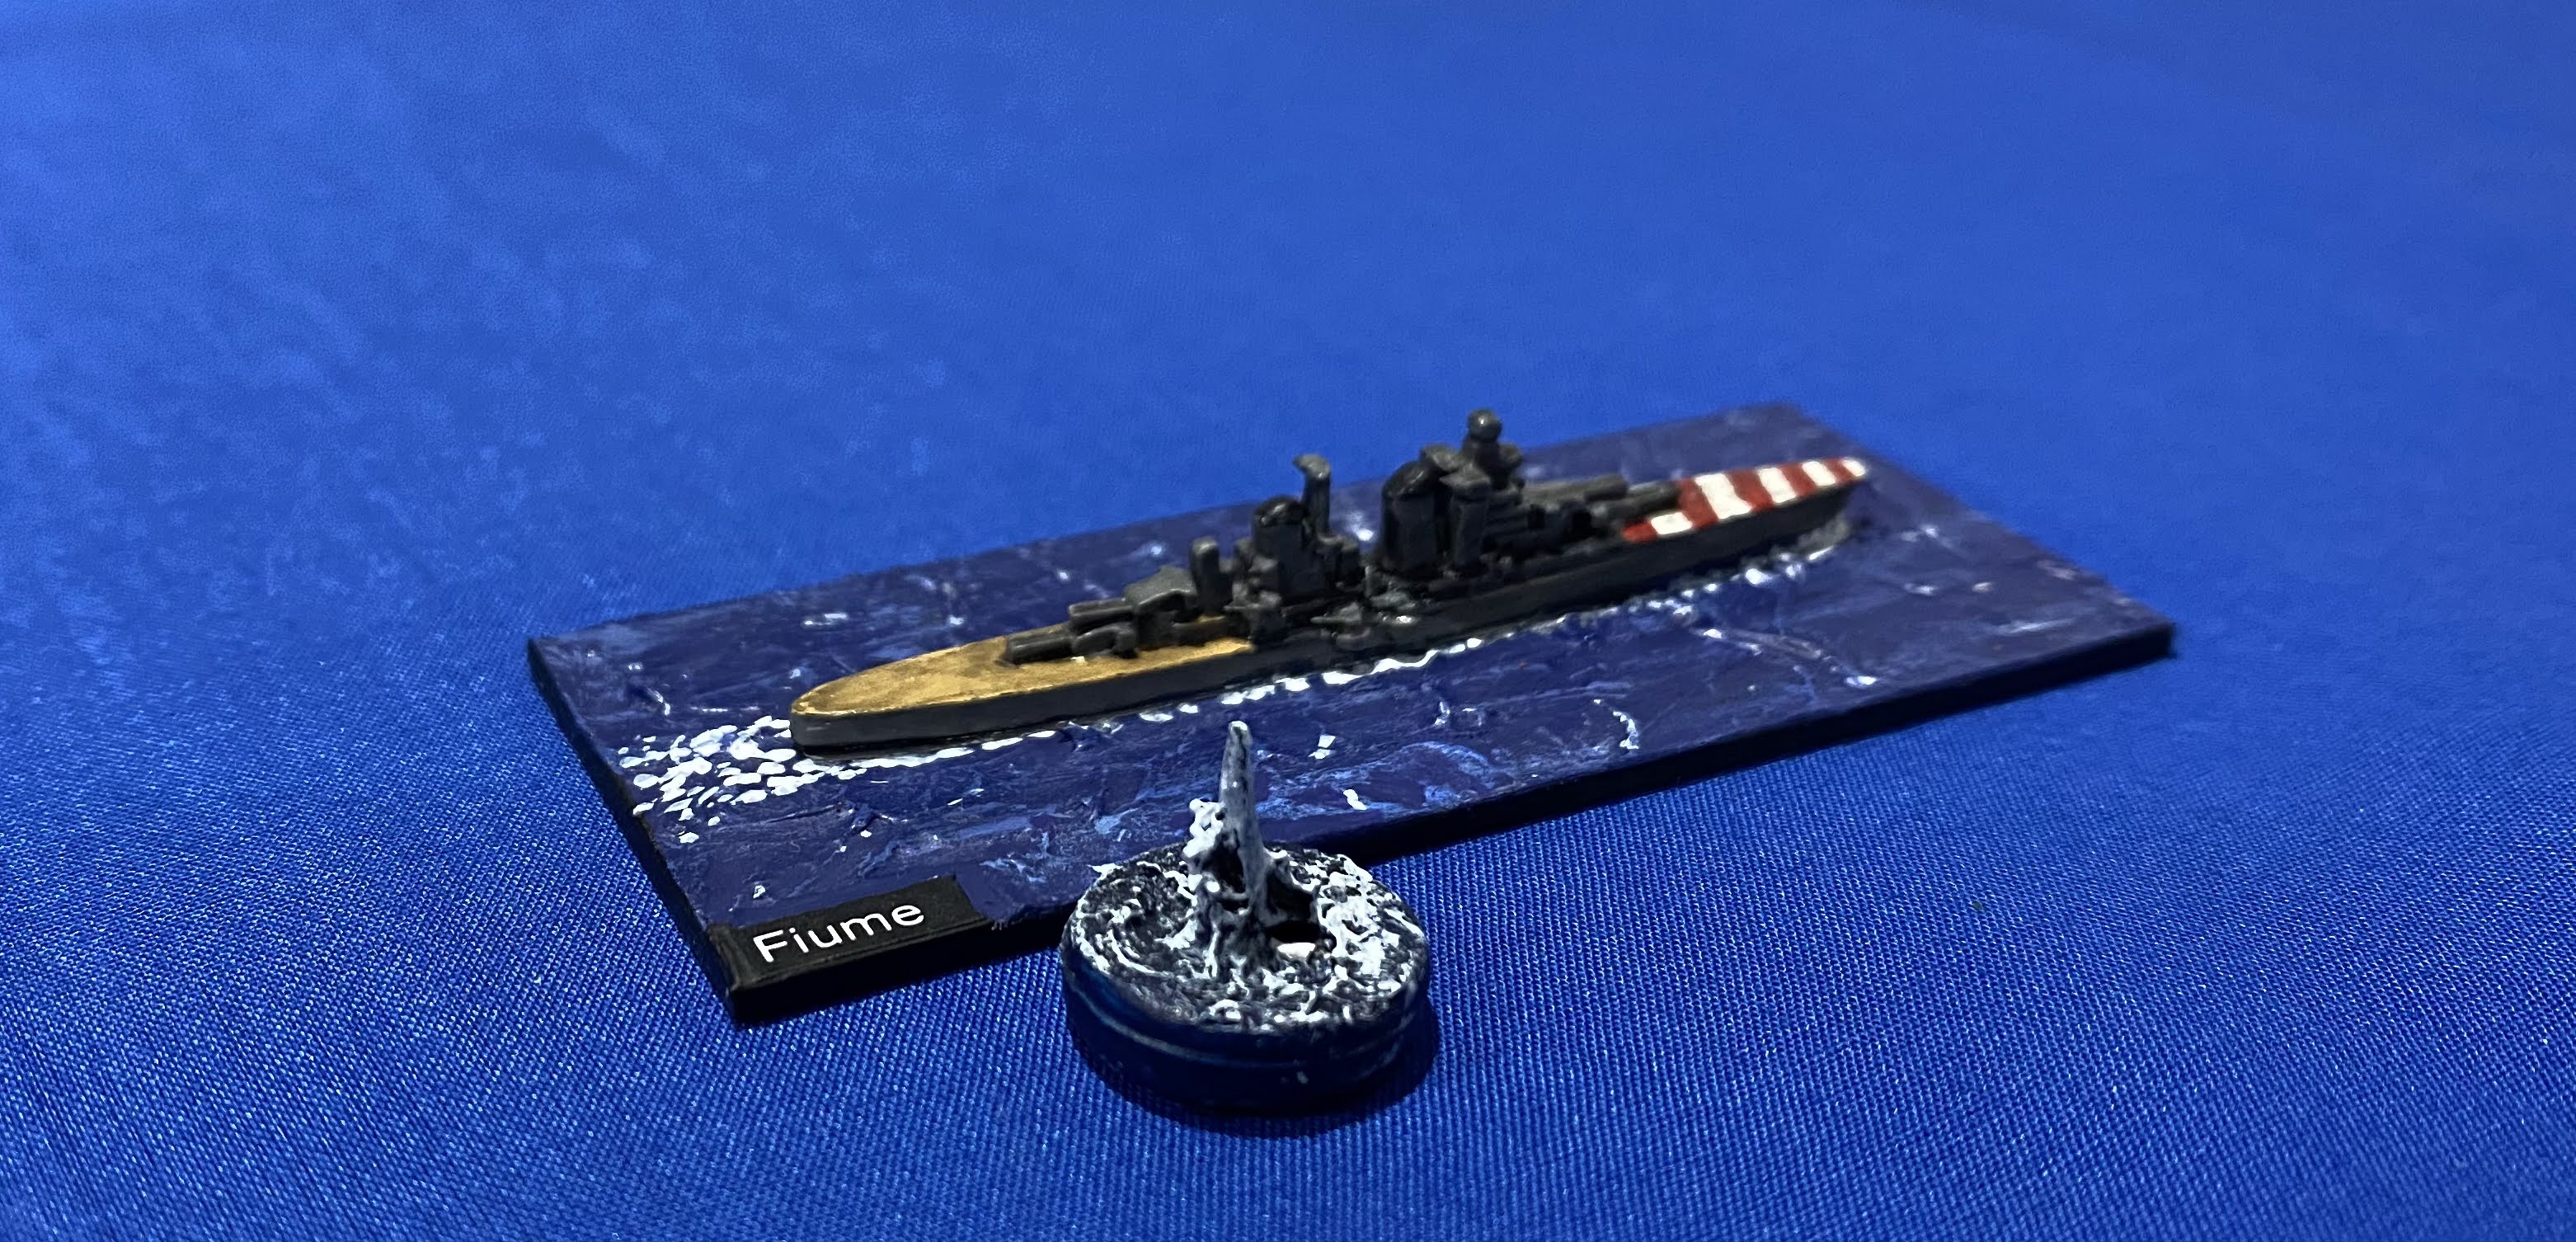
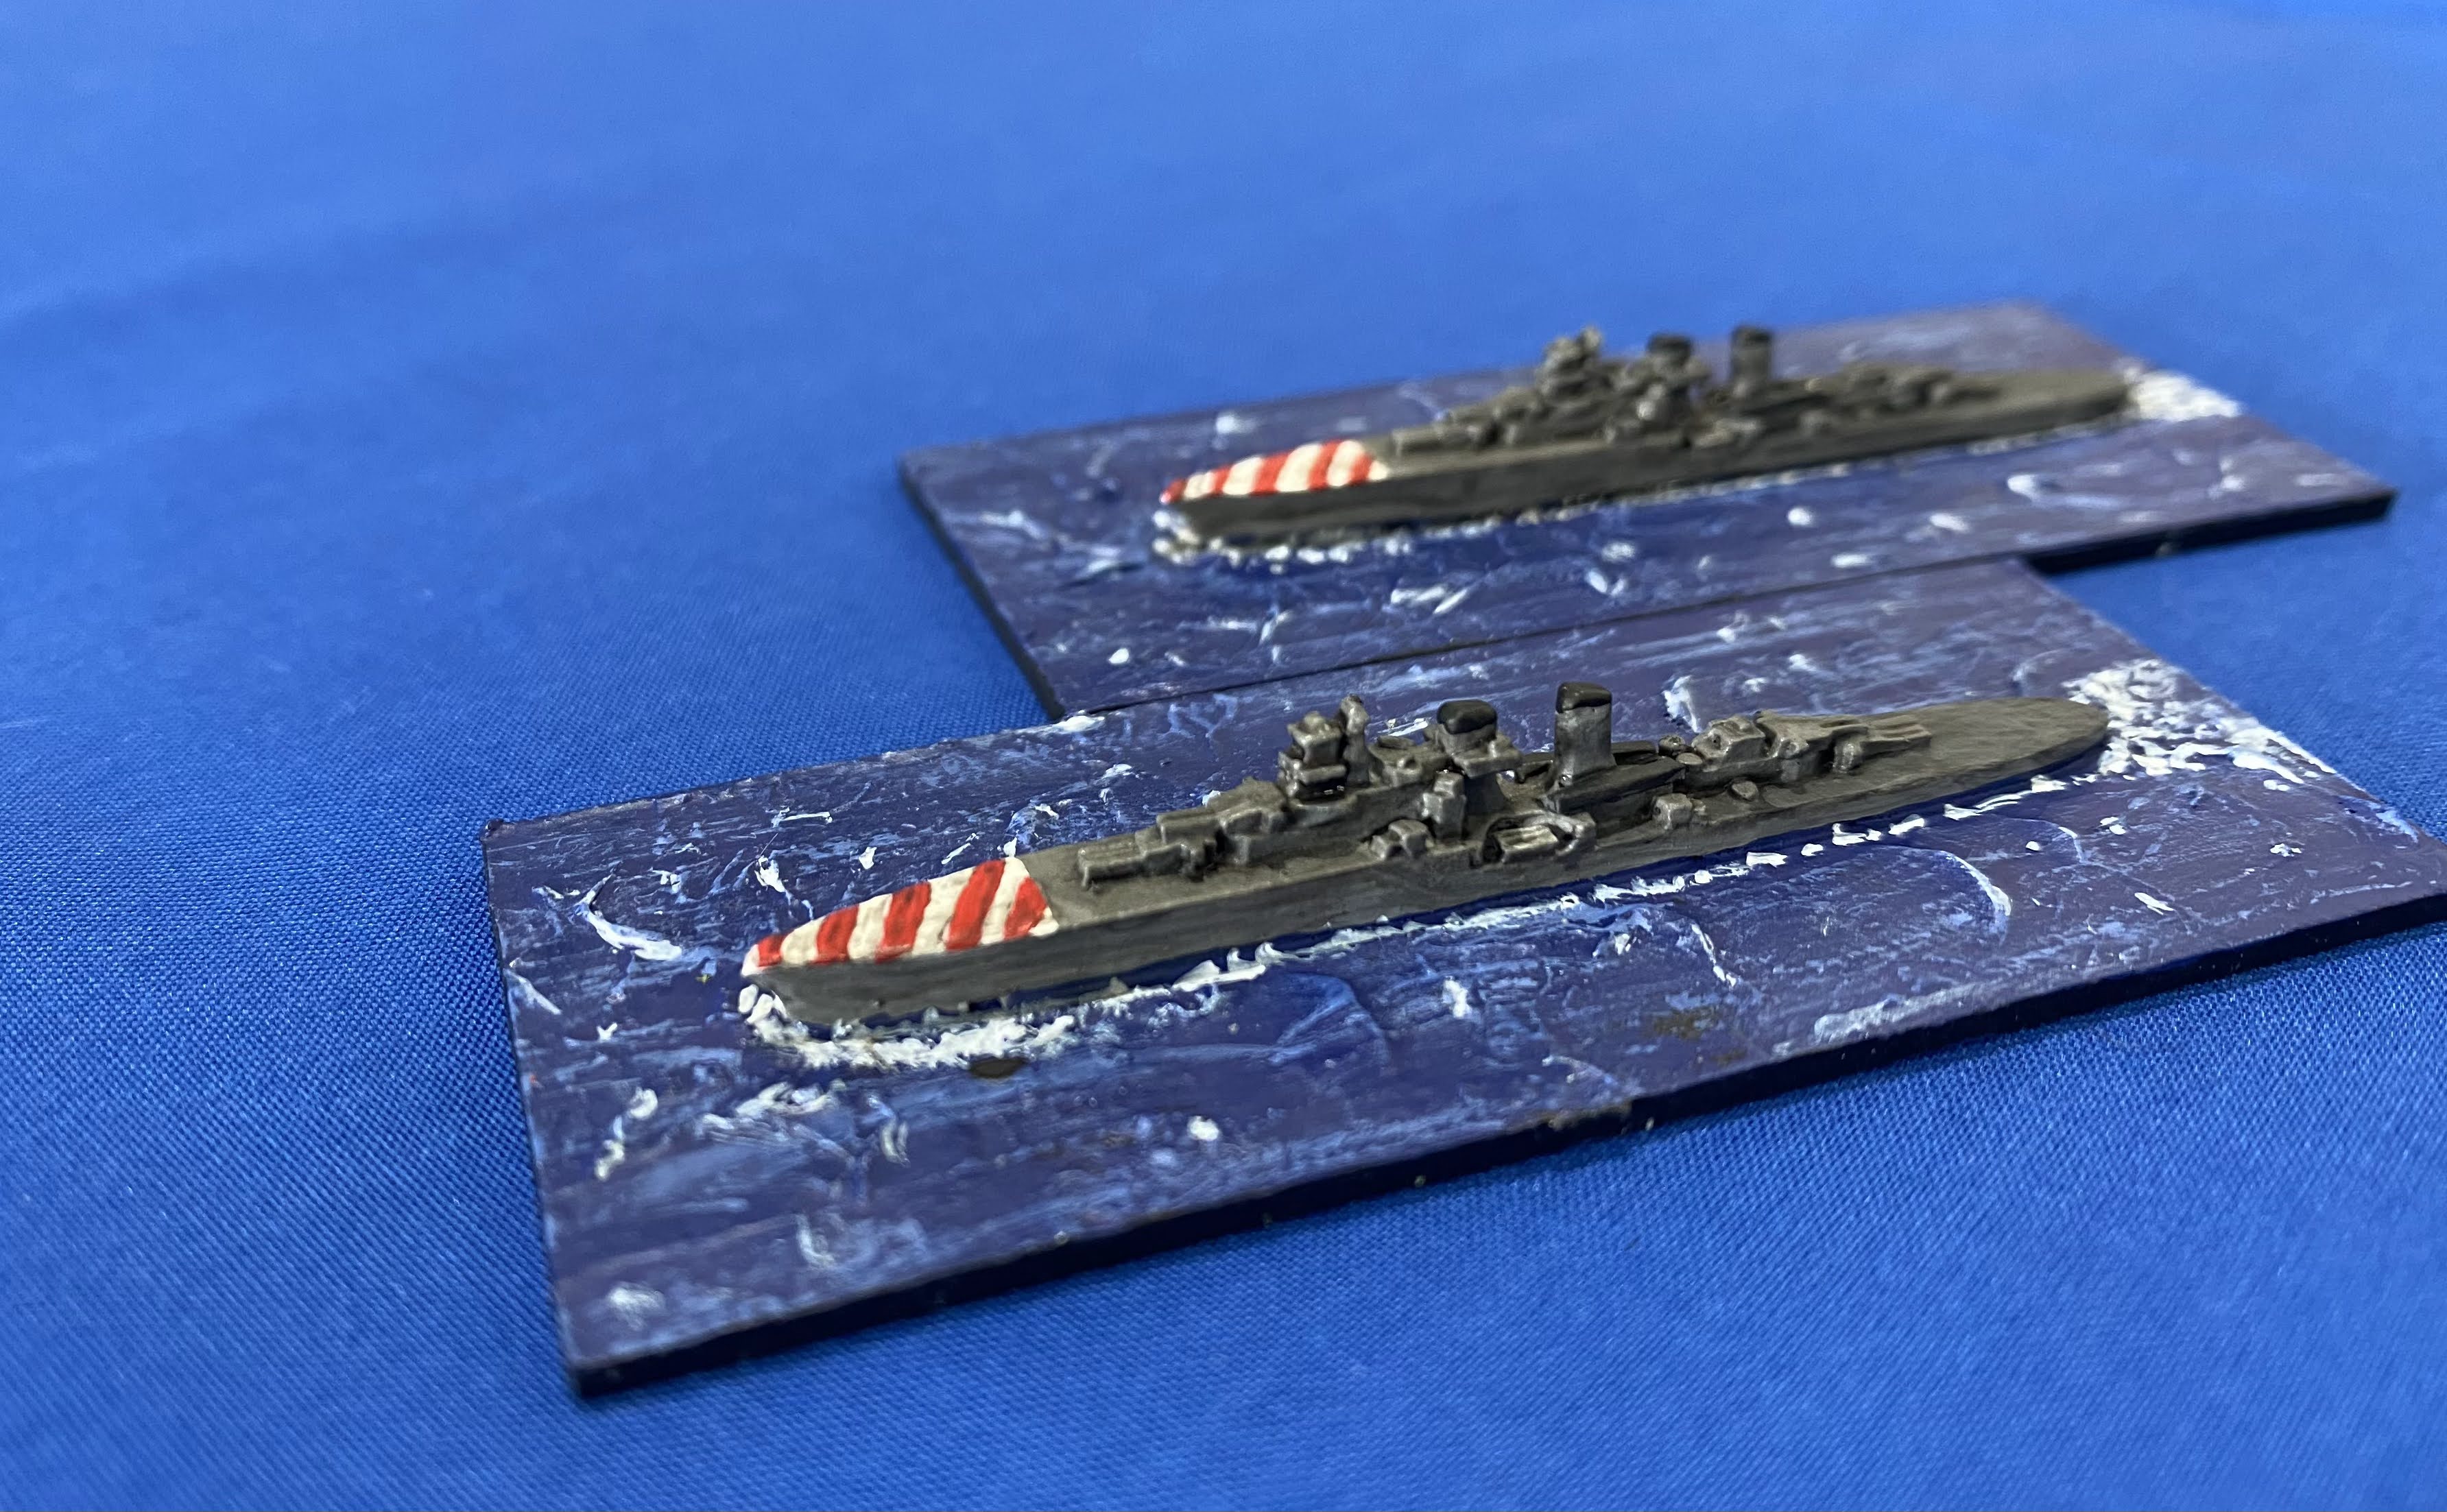
Returning from escorting a convoy to Libya, and now steaming in line astern in a south-westerly direction, were the light cruisers Luigi di Saoia Duca degli Abbruzzi & Giuseppe Garibaldi, both from the 8th Cruiser Division. Vice Admiral Antonio Legnani, as commander of the 8th Cruiser Division, had his flag on the Abbruzzi. The Abbruzzi was, without doubt, a fine ship. Fast and well armed with ten 6” guns in four turrets. Legani was confident in the ship, his own abilities and of course Il Duce’s plans for the Mediterranean. Further astern, and in support of the 8th Cruiser Division was the slightly slower, but more powerful, heavy cruiser Fiume.
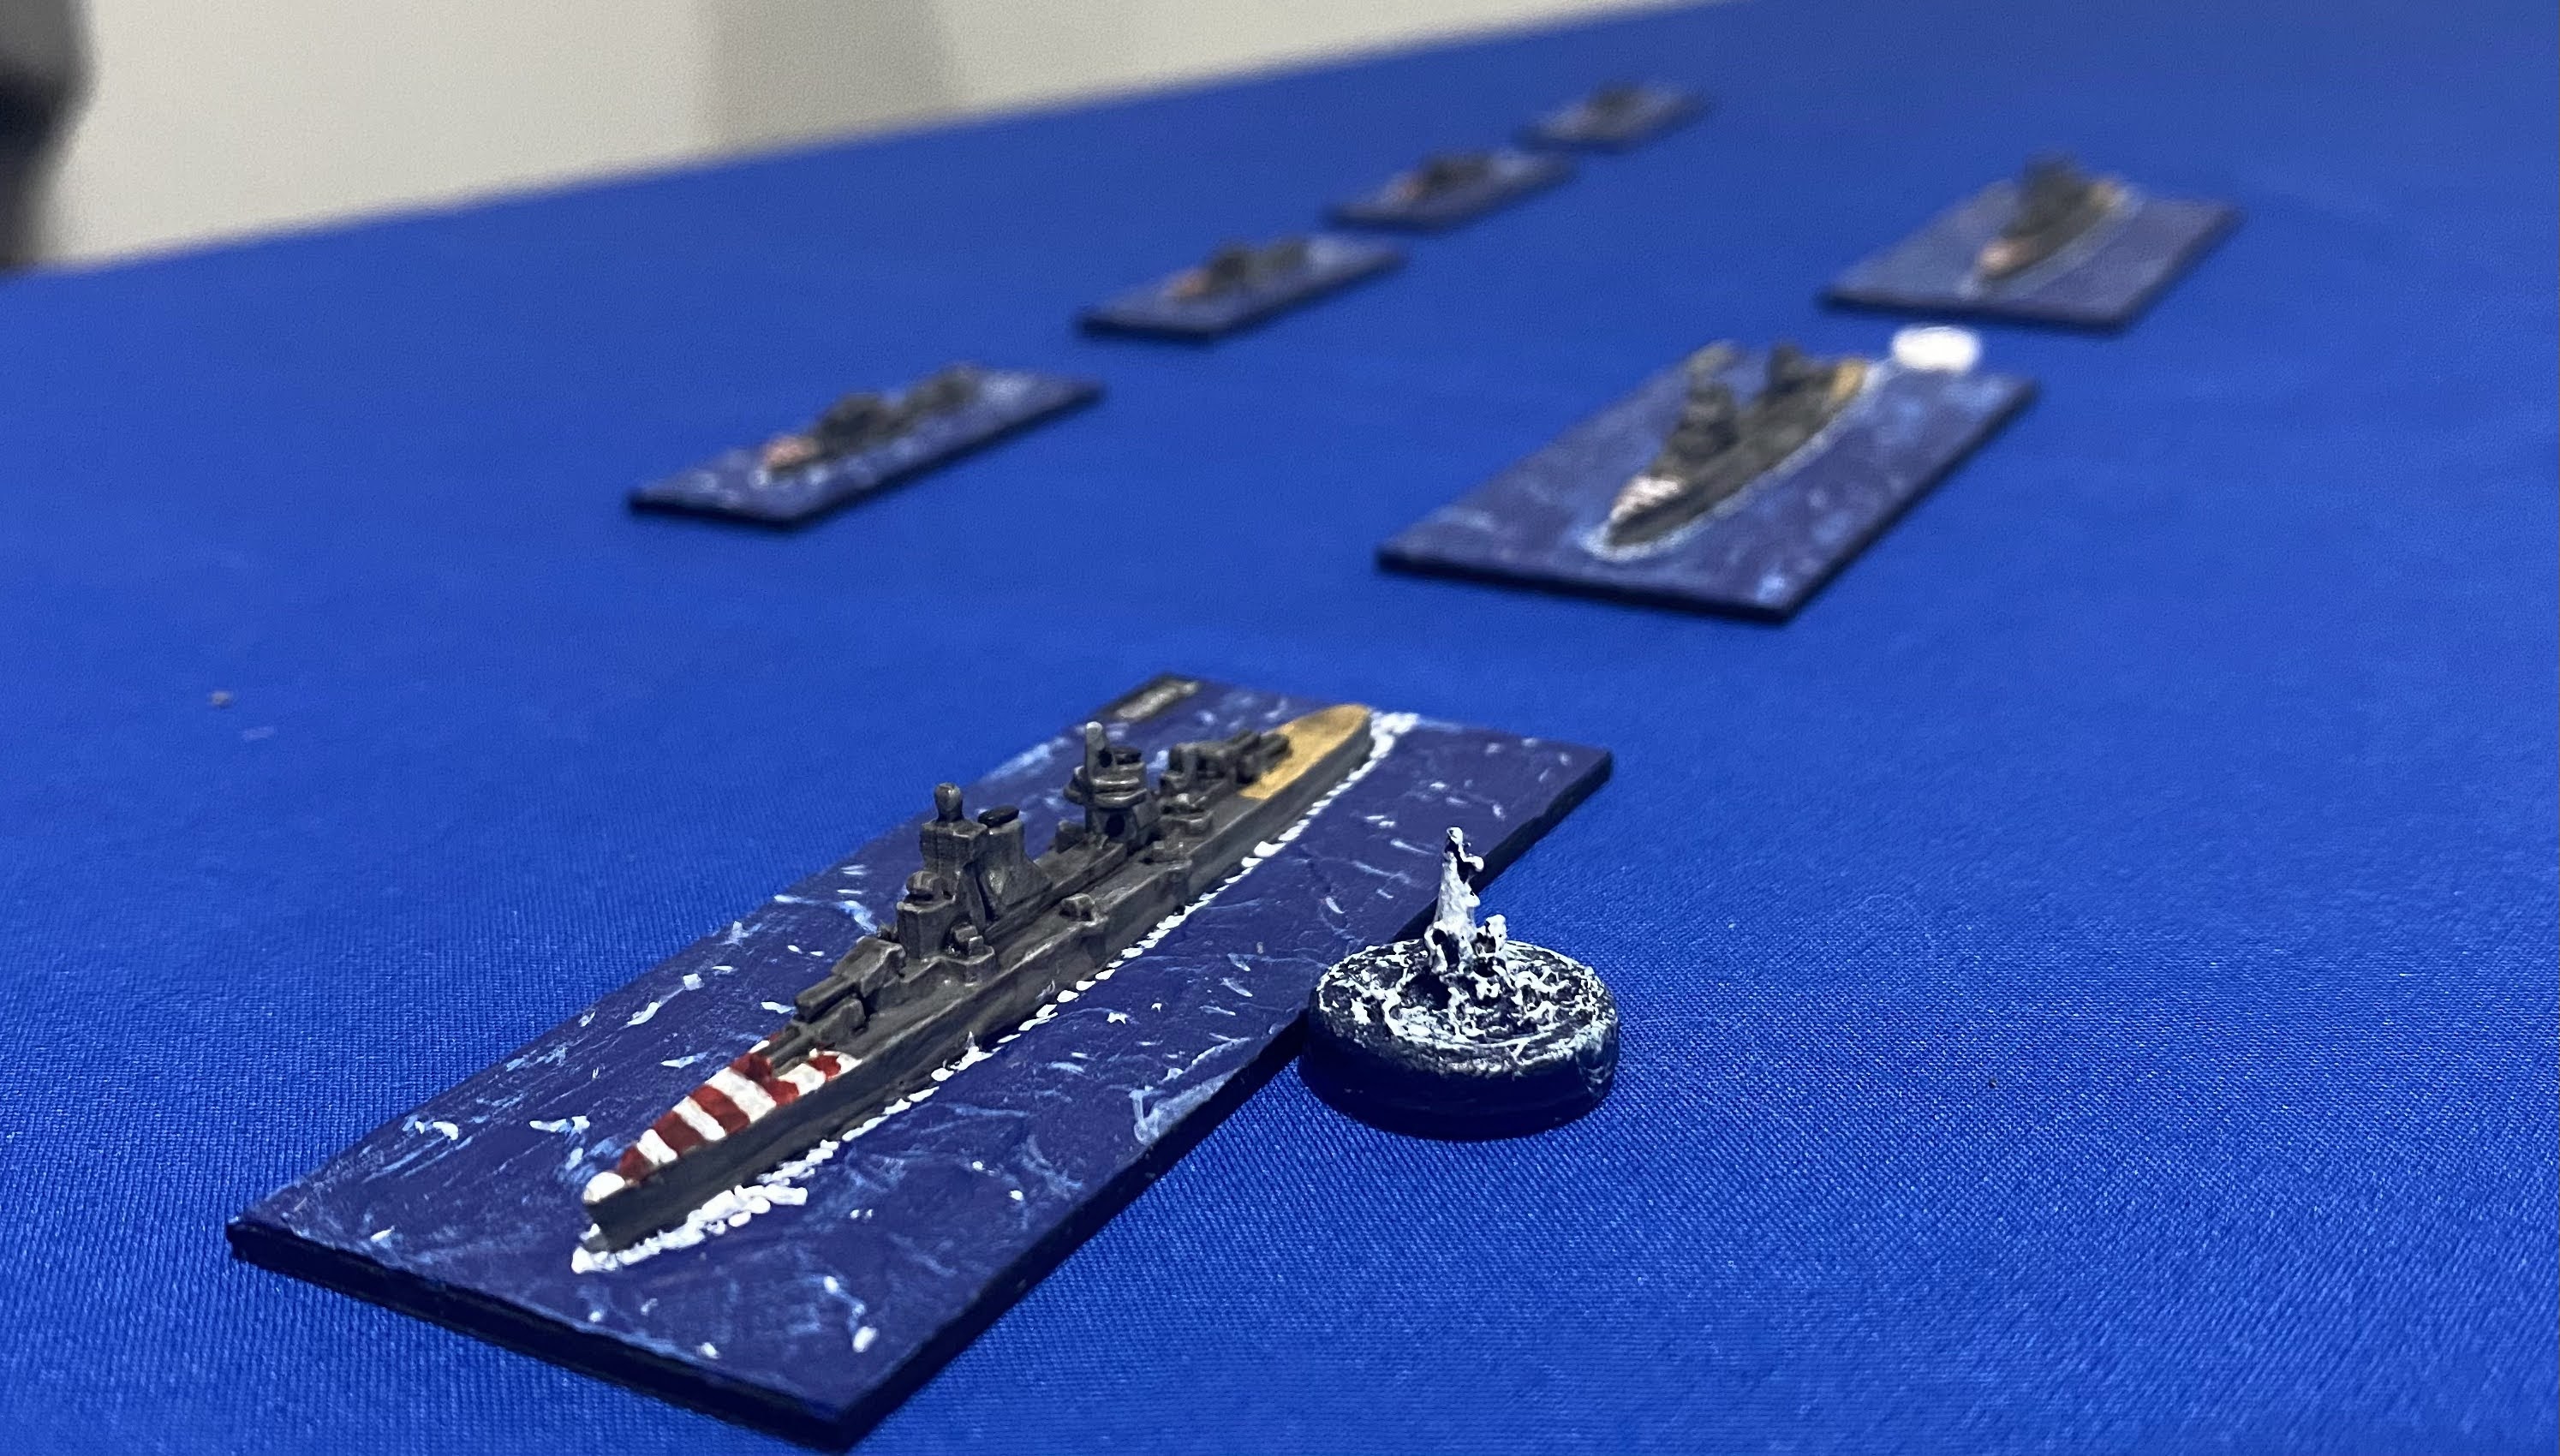
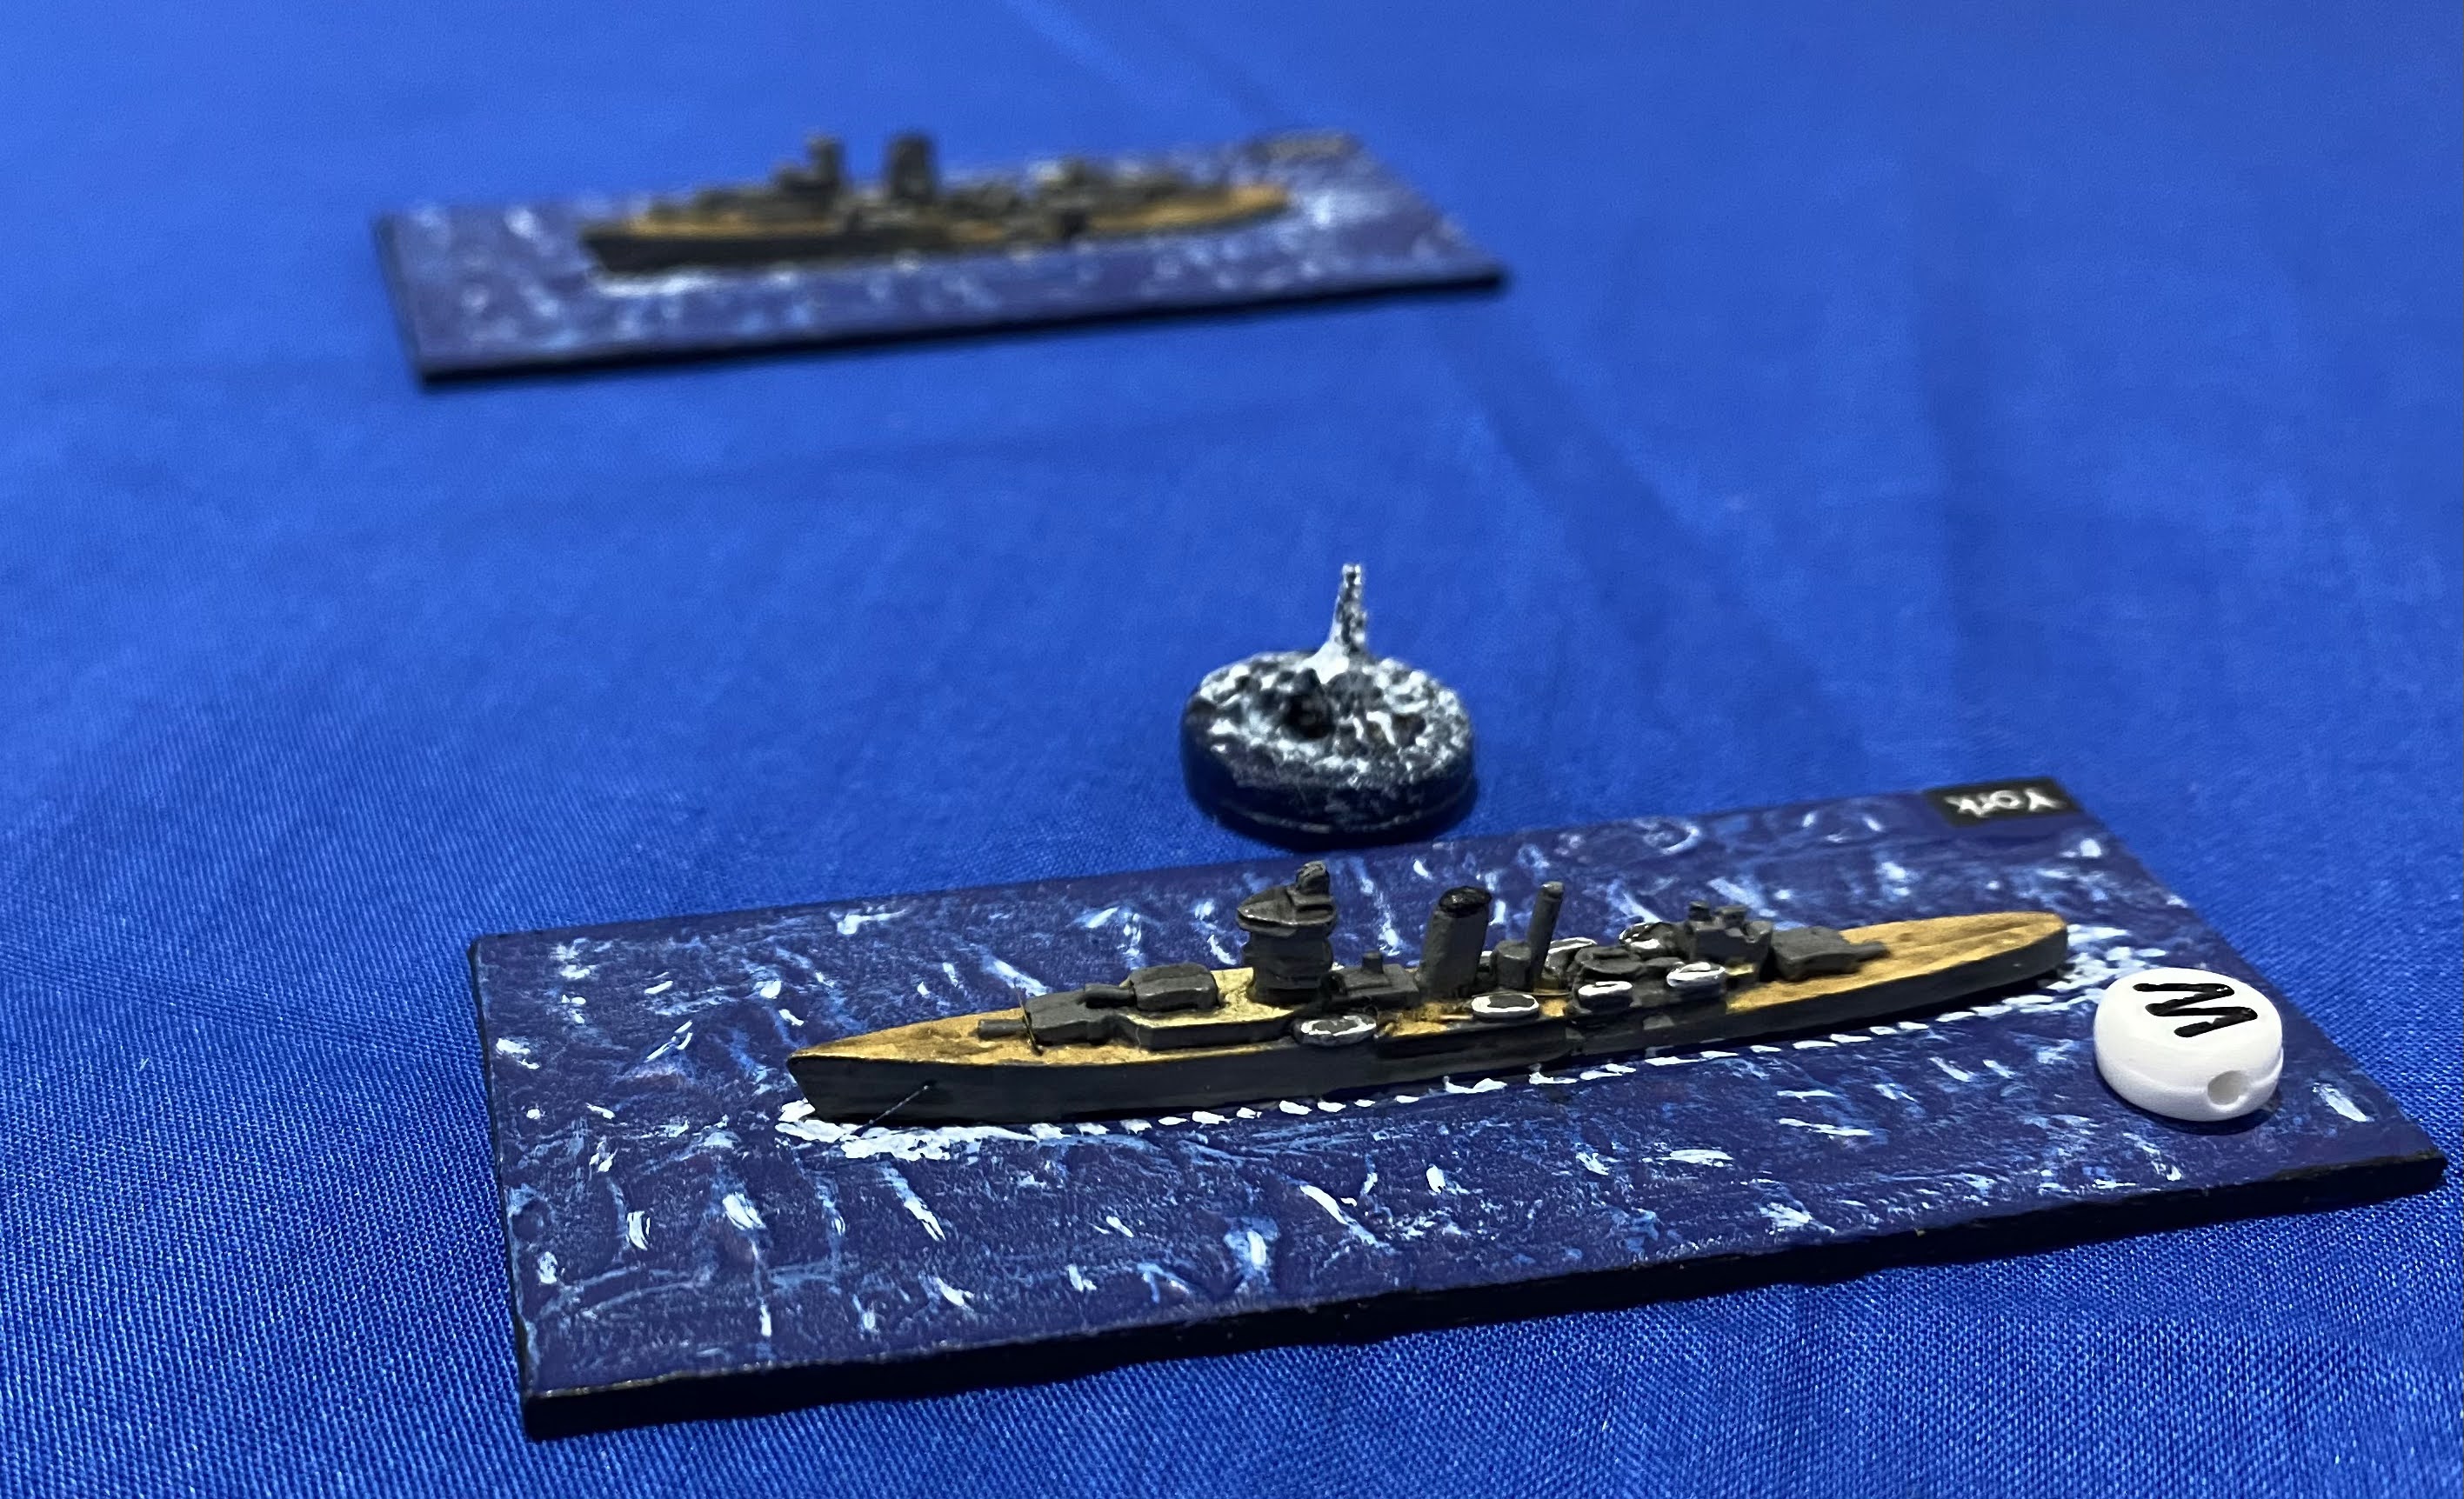
At 14:15 lookouts spotted an enemy squadron to the southwest on a generally converging course. The enemy comprised the heavy cruiser HMS York while astern were the light cruisers HMS Orion and HMAS Perth.
In an effort to seize the initiative and concentrate fire, Vice Admiral Antonio Legnani now split his force. The light cruisers turned hard to port while the Fiume increased speed and turned slightly to starboard before heading on a generally westerly course. In affect he was now moving in an “L” shaped formation. Simultaneously, the enemy executed a turn to port bring them increasingly opposite the light cruisers but placing them on a course that would eventually head towards the broadside of the Fiume.
Below, the Luigi di Saoia Duca degli Abbruzzi & Giuseppe Garibaldi soon after executing their turn to port with the Abbruzzi under fire.
Now however disaster struck. Vice Admiral Legnani, intended all his ships to concentrate their fire on HMS York in an effort to knock her out quickly. HMS York however ignored the threat posed by the Fiume and directed her fire on Legnani’s flagship the light cruiser Luigi di Saoia Duca degli Abbruzzi. Shortly after opening fire an 8” shell penetrated the Abbruzzi’s armour. This penetration was catastrophic as it triggered a magazine explosion which blew up the Abbruzzi!
Above, the Abbruzzi erupts after a main magazine explosion, the chance of which was low. British morale reached an all time high at this point!
Despite the catastrophic loss the remaining Italian captains retained their resolve. The Giuseppe Garibaldi and Fiume poured their fire on HMS York. Now acutely aware of the risk posed by the Fiume’s 8” guns, HMS York began to engage the Italian heavy cruiser while HMS Orion and HMAS Perth combined their fire at Garibaldi, despite the long range.
Above, HMS York on the right is under fire from Fiume, while astern is HMS Orion herself under fore from Giuseppe Garibaldi. The splash markers are homemade by Alastair and while usually placed to model fire by heavier guns we have used them more liberally for visual impact in this game.
Below, the Fiume is engaged by the 8″ guns of HMS York. Fiume has an eight gun broadside of 8″ guns, while HMS York has a broadside of six 8″ guns. However, York’s radar give it a notable advantage.
Below, the Giuseppe Garibaldi is shown under fire by HMS Orion and HMAS Perth. Garibaldi like Abbruzzi was the last group of Condottieri class light cruisers.
With the weight of fire directed at her, and the benefits of provided by British gunnery radar, the Garibaldi now executed a further turn to port and using her superior speed increased the range while her aft main guns plied their trade on the pursuing light cruisers.
Meanwhile, Fiume’s persistence was paying off. With fires raging on HMS York and some flooding HMS Orion was ordered to change course to relieve the pressure on HMS York.
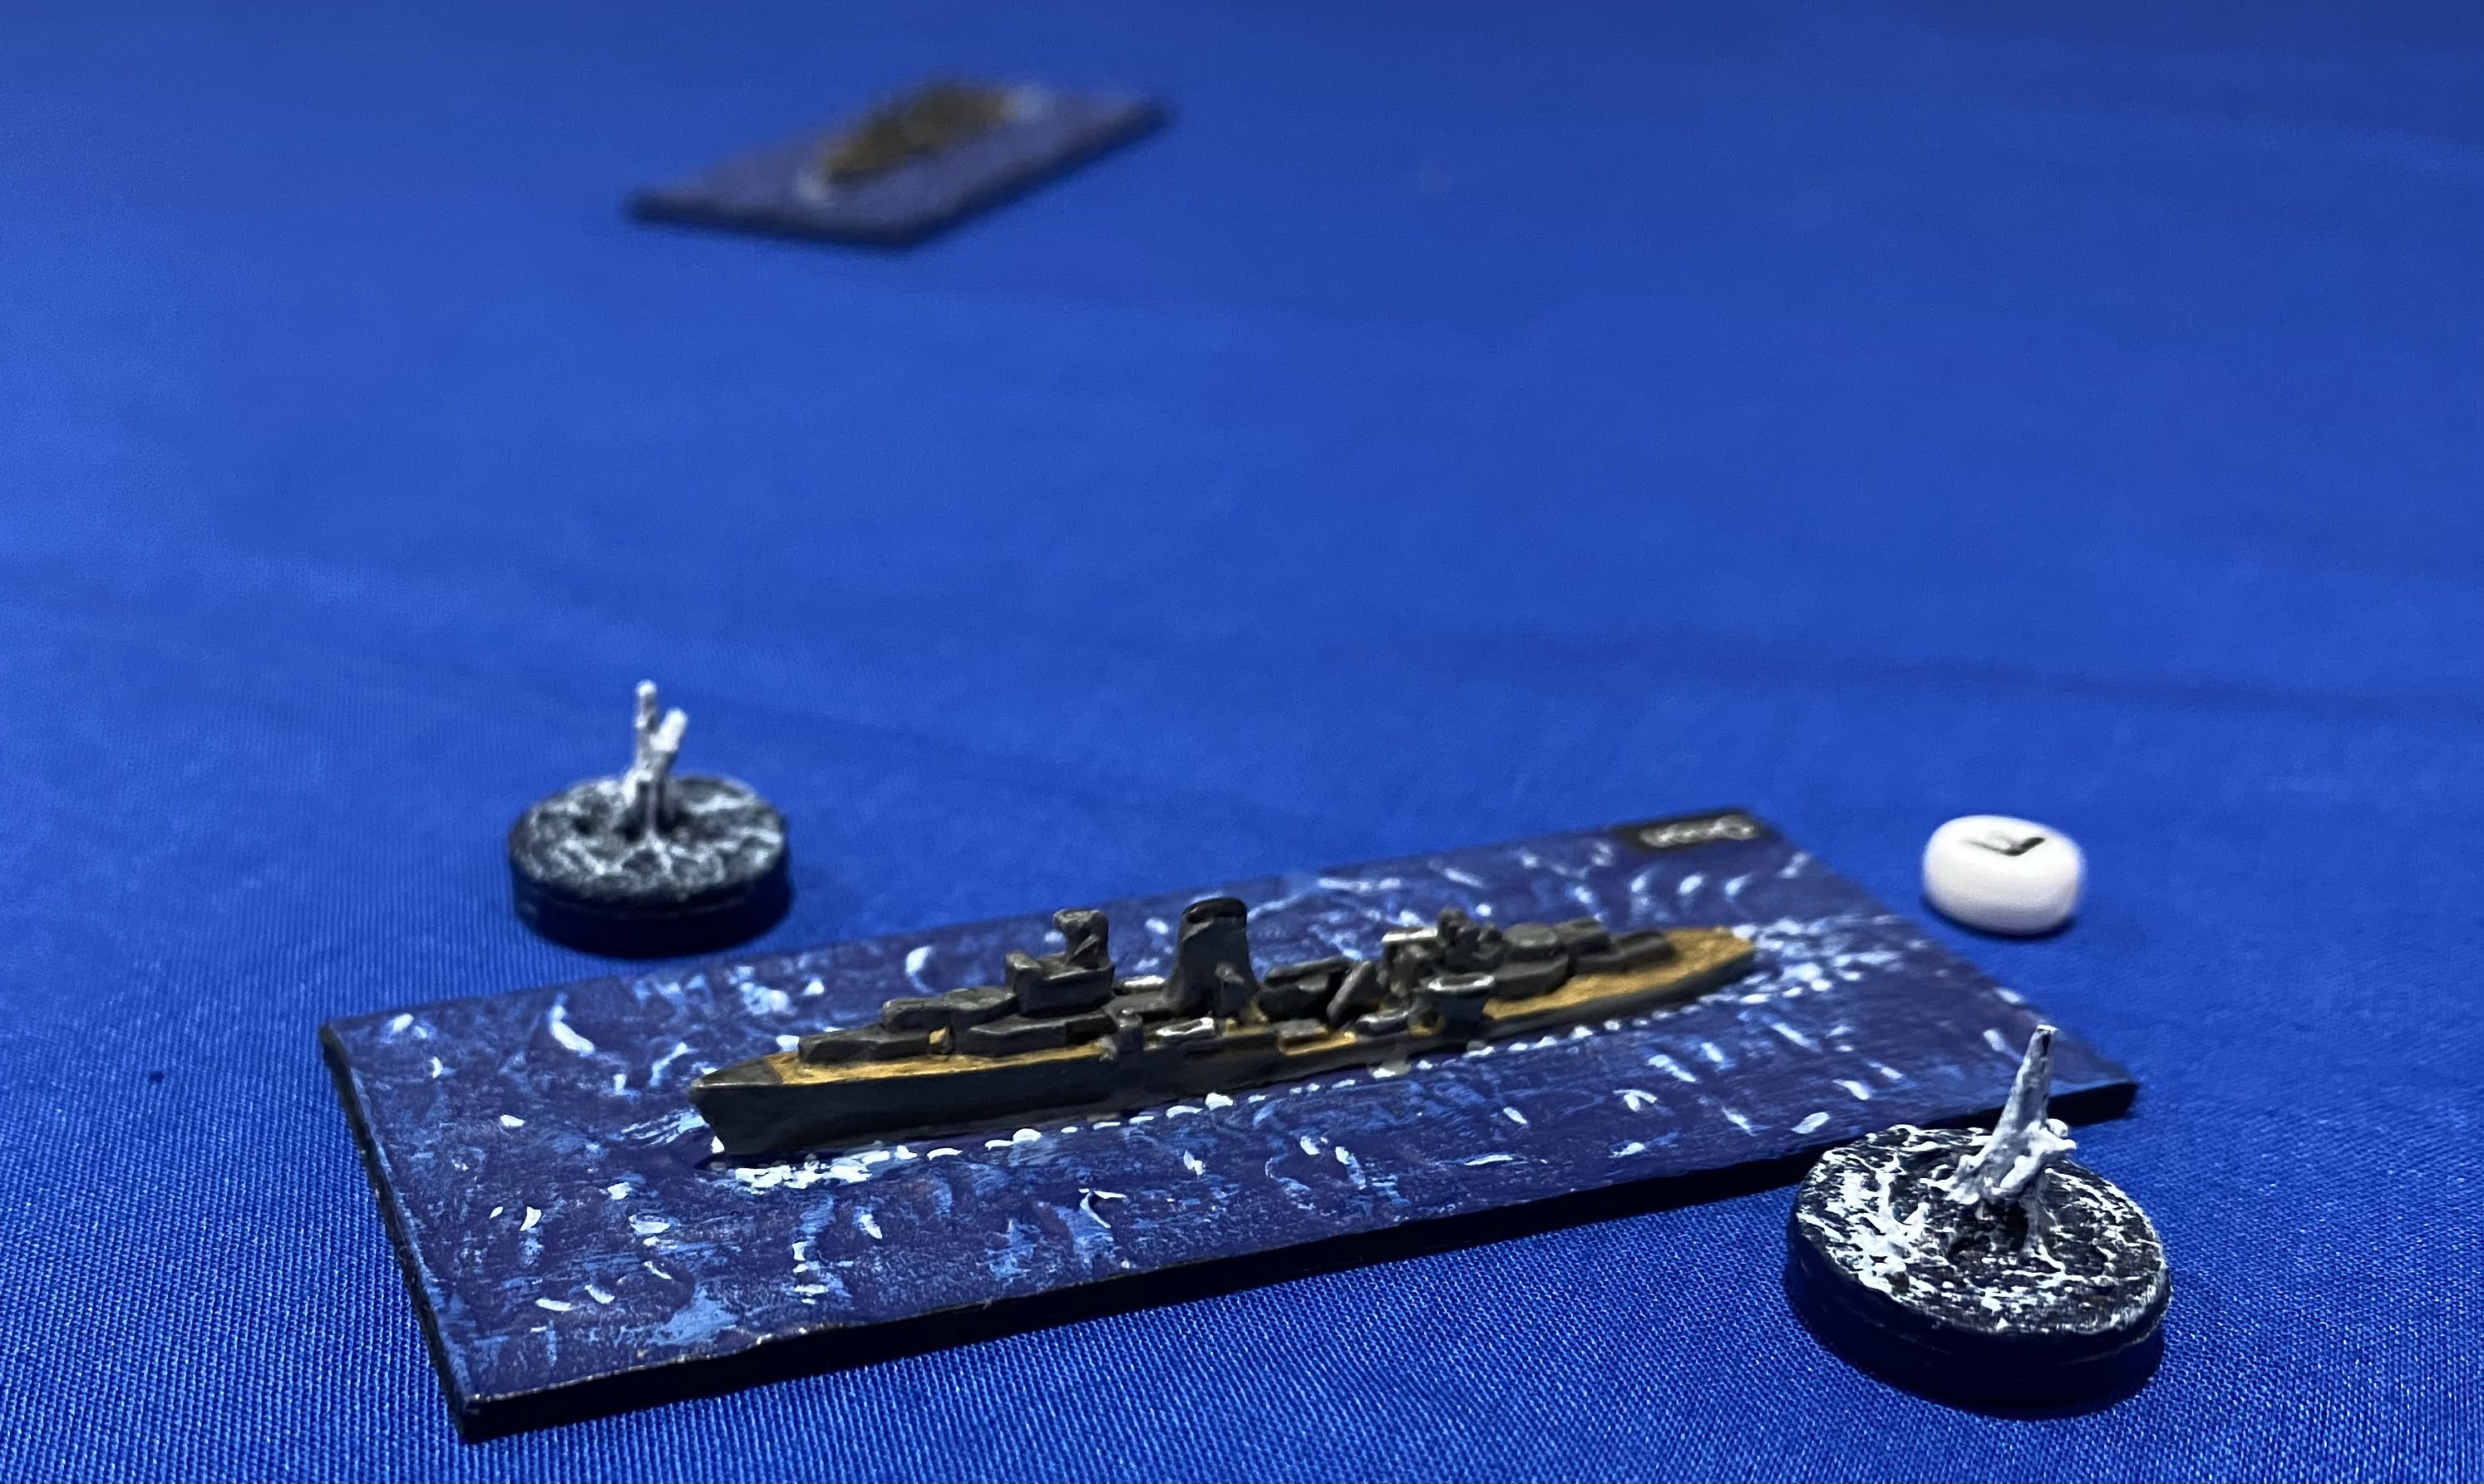
Below, HMS York in the foreground. She is now taking on water due to flooding as designated by the white marker. In the distance HMS Orion before she turned to support HMS York.
Unfortunately, Orion’s move to support York was too late. After another series of broadsides from Fiume, HMS York succumbed to further damage and flooding.
Now it was HMS Orion that was under pressure. Where before she was steaming to support HMS York she was now under fire from the Fiume and a returning Giuseppe Garibaldi as can be seen below.
HMS Orion’s situation was hopeless, soon she was overwhelmed by a combination of infrastructure damage, fire and flooding predominantly delivered by Fiume’s 8” guns.
At this point HMAS Perth, completely unscathed, decided it was time to break off. Turning away she was able to extend the range rapidly, in part because the Fiume and Giuseppe Garibaldi were in no fit state to pursue.
This completed our first engagement with Naval Thunder. We were pretty slow working our way through the rules, but I suspect with more experience the game will flow more quickly. My initial concerns around movement and firing distances were unfounded as the game had a good feel to it, with a balance between time and space. I can also see that with even a few ships aside an enjoyable game can be played. No doubt we made lots of mistakes, but generally the rules played well.
Finally, it would be remiss of me to not mention that the miniatures are from Navwar’s 1/3000th range. In my view they provide good amount of detail, at an affordable price.
When I was at high school in the 1970s I played a little World War II naval. Some great games were played and much reading occurred. The models were inexpensive, the games short, all ideal for wargaming at the college wargames club over a lunch break. However, by the 1980s frustration with some “newer” rules, combined with other interests, drew me to other periods. That was until I played a couple of games with my son a couple of years ago which rekindled my interest.
After some consideration, and being unhappy with the old models that dated back to the 1970s, an order was sent to Navwar to secure some 1/3000th models. In due course the models arrived and after a period in the lead mountain it was time to start some painting.
But where should I start? After some further consideration the first group of models were selected for the painting table – in particular vessels for the Italian Royal Navy, or Regia Marina. Now, while it was tempting to dive in the deep end and start with some battleships I opted to start with lighter forces. First two heavy cruisers the Zara and Fiume, shown below.
These ships always struck me as both colourful while having strong lines, in part influenced by an old book I have dating back to the 1970’s which provided so much inspiration at the time. My view hasn’t changed much in 40+ years, yes a little nostalgia. Now, the Zara class cruisers were armed with a respectable main armament of eight 8” guns and were heavily armoured. The distinctive air recognition provides a striking affect, though was tricky to paint. Both cruisers entered service in 1931 and were active in the early part of the war. Both served at the Battle of Matapan where they, along with their sistership Pola, were lost.
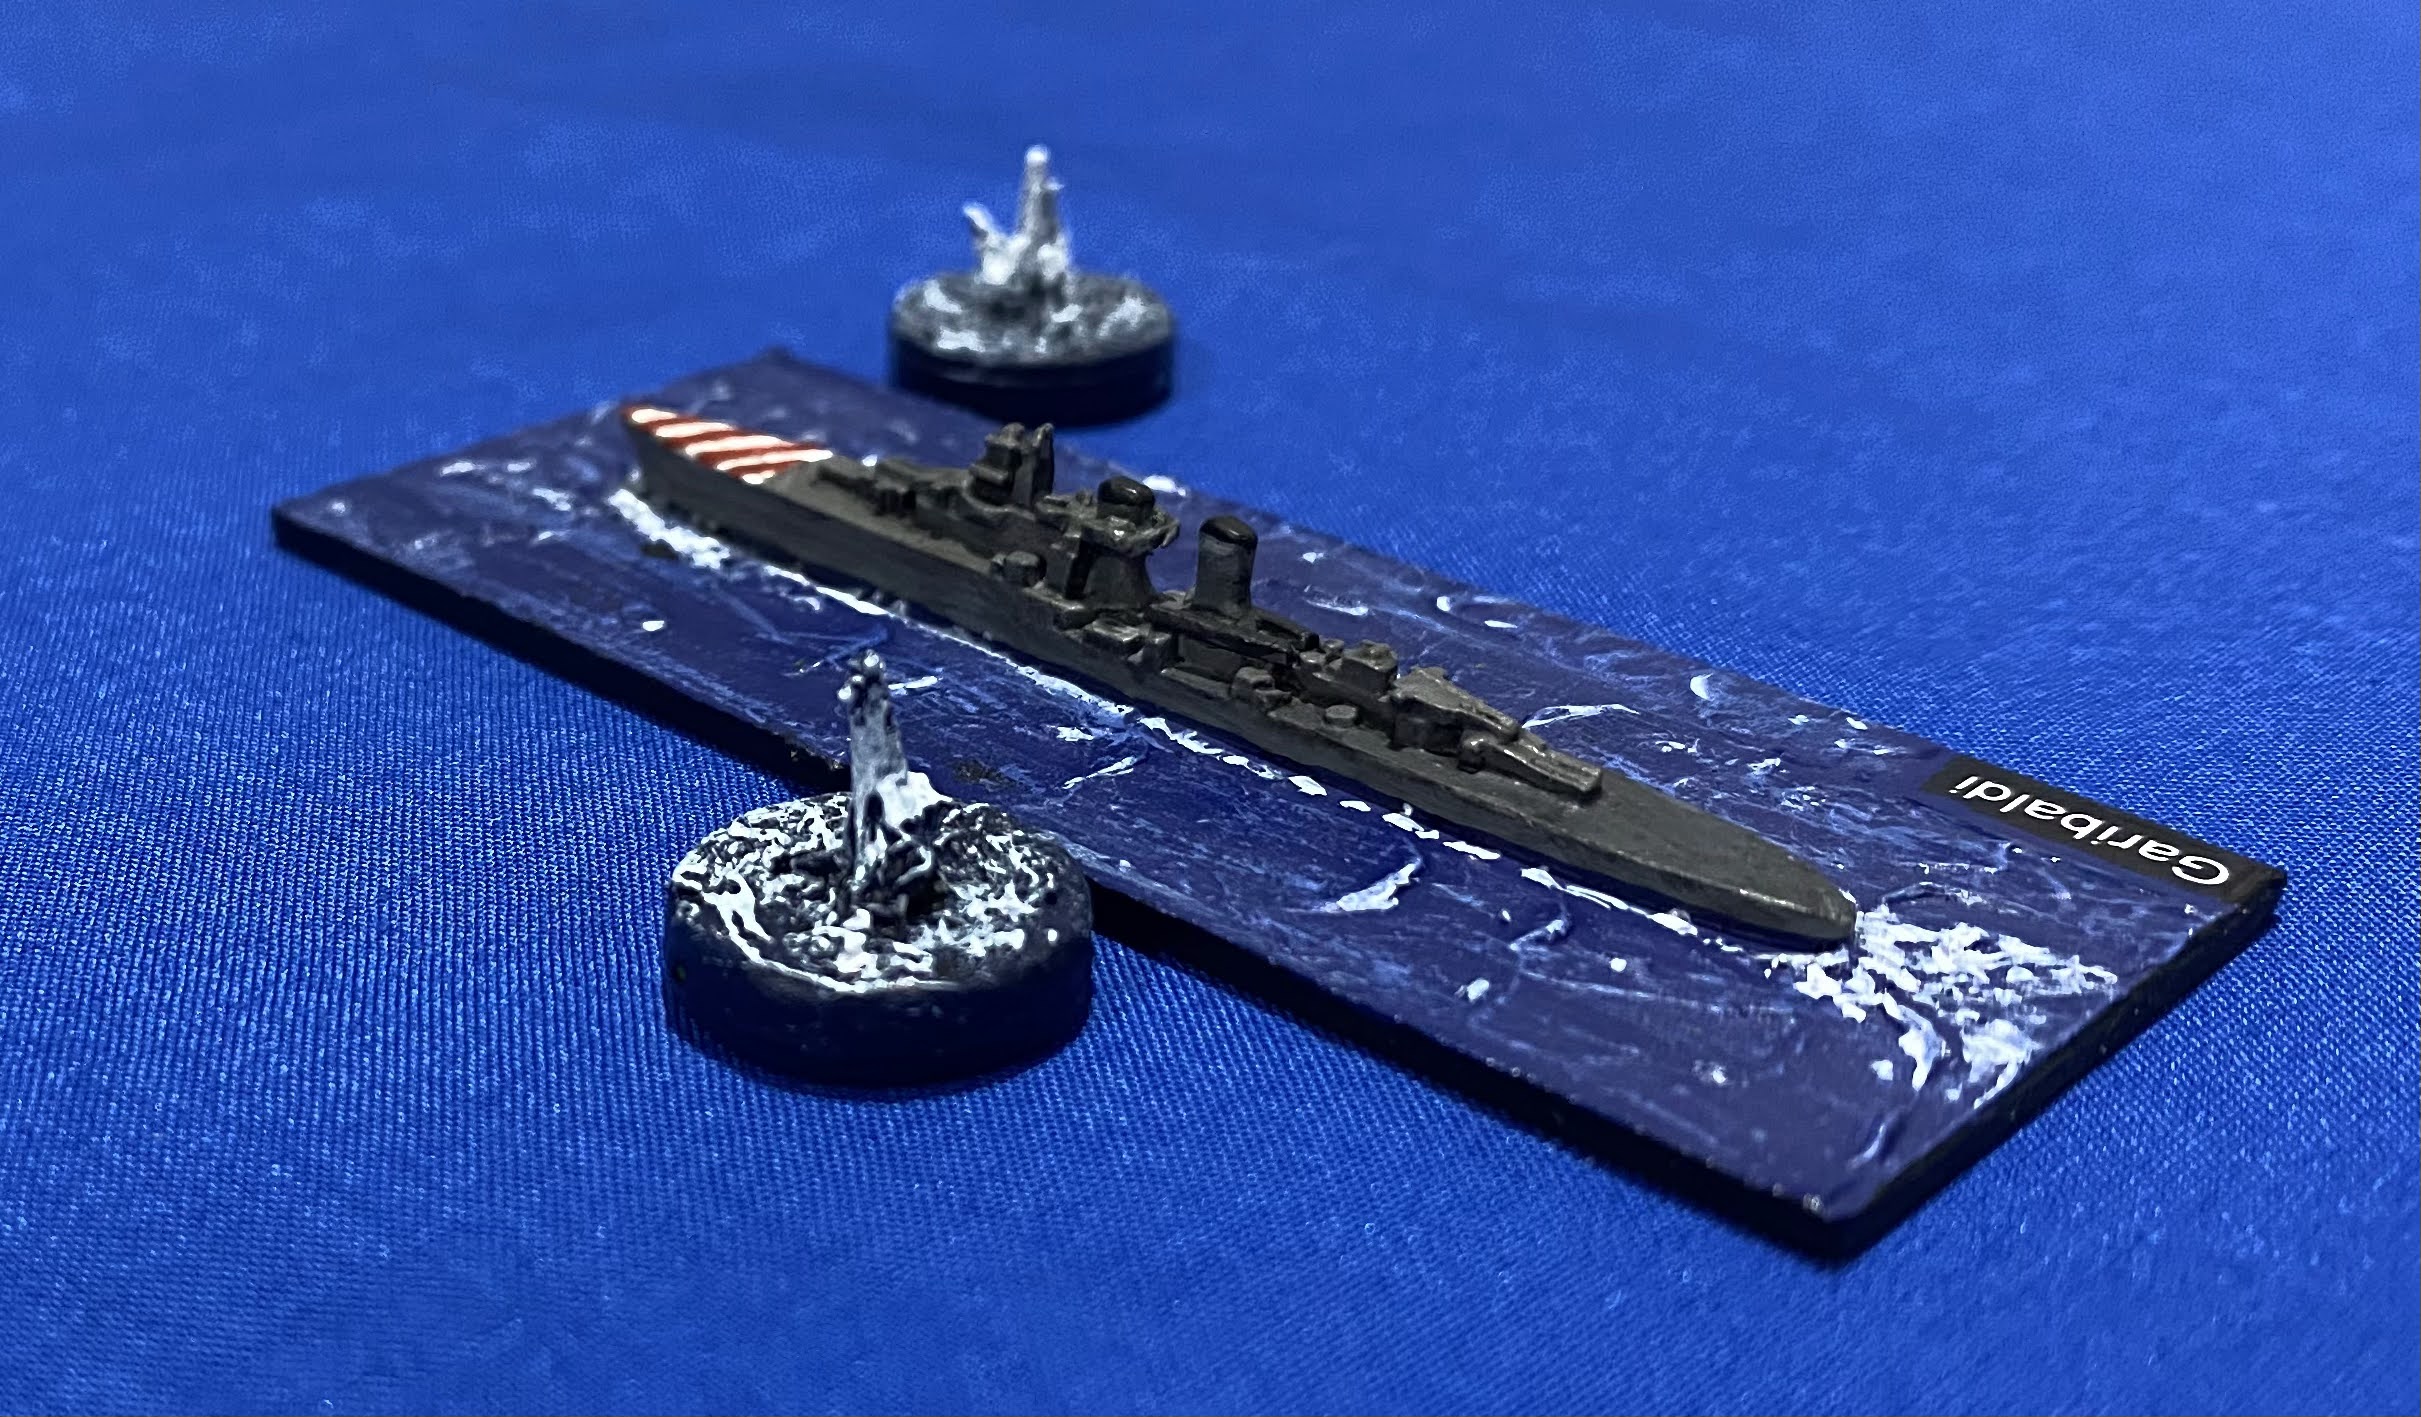
To support the heavy cruisers, or provide some variation, some light cruisers were also needed. Those chosen for the first batch were Giuseppe Garibaldi and Luigi di Saoia Duca degli Abbruzzi. If nothing else the ship names provide plenty of colour, though how I will abbreviate the names to place on the labels I am not completely sure!
These cruisers carried a significant armament with ten 6” guns with a reasonable turn of speed. They, along with one additional cruiser, formed the 8th Cruiser Division. They entered service in 1937 and had a long career. Luigi di Saoia Duca degli Abbruzzi was decommissioned in 1961 while Garibaldi remained in service until 1971.
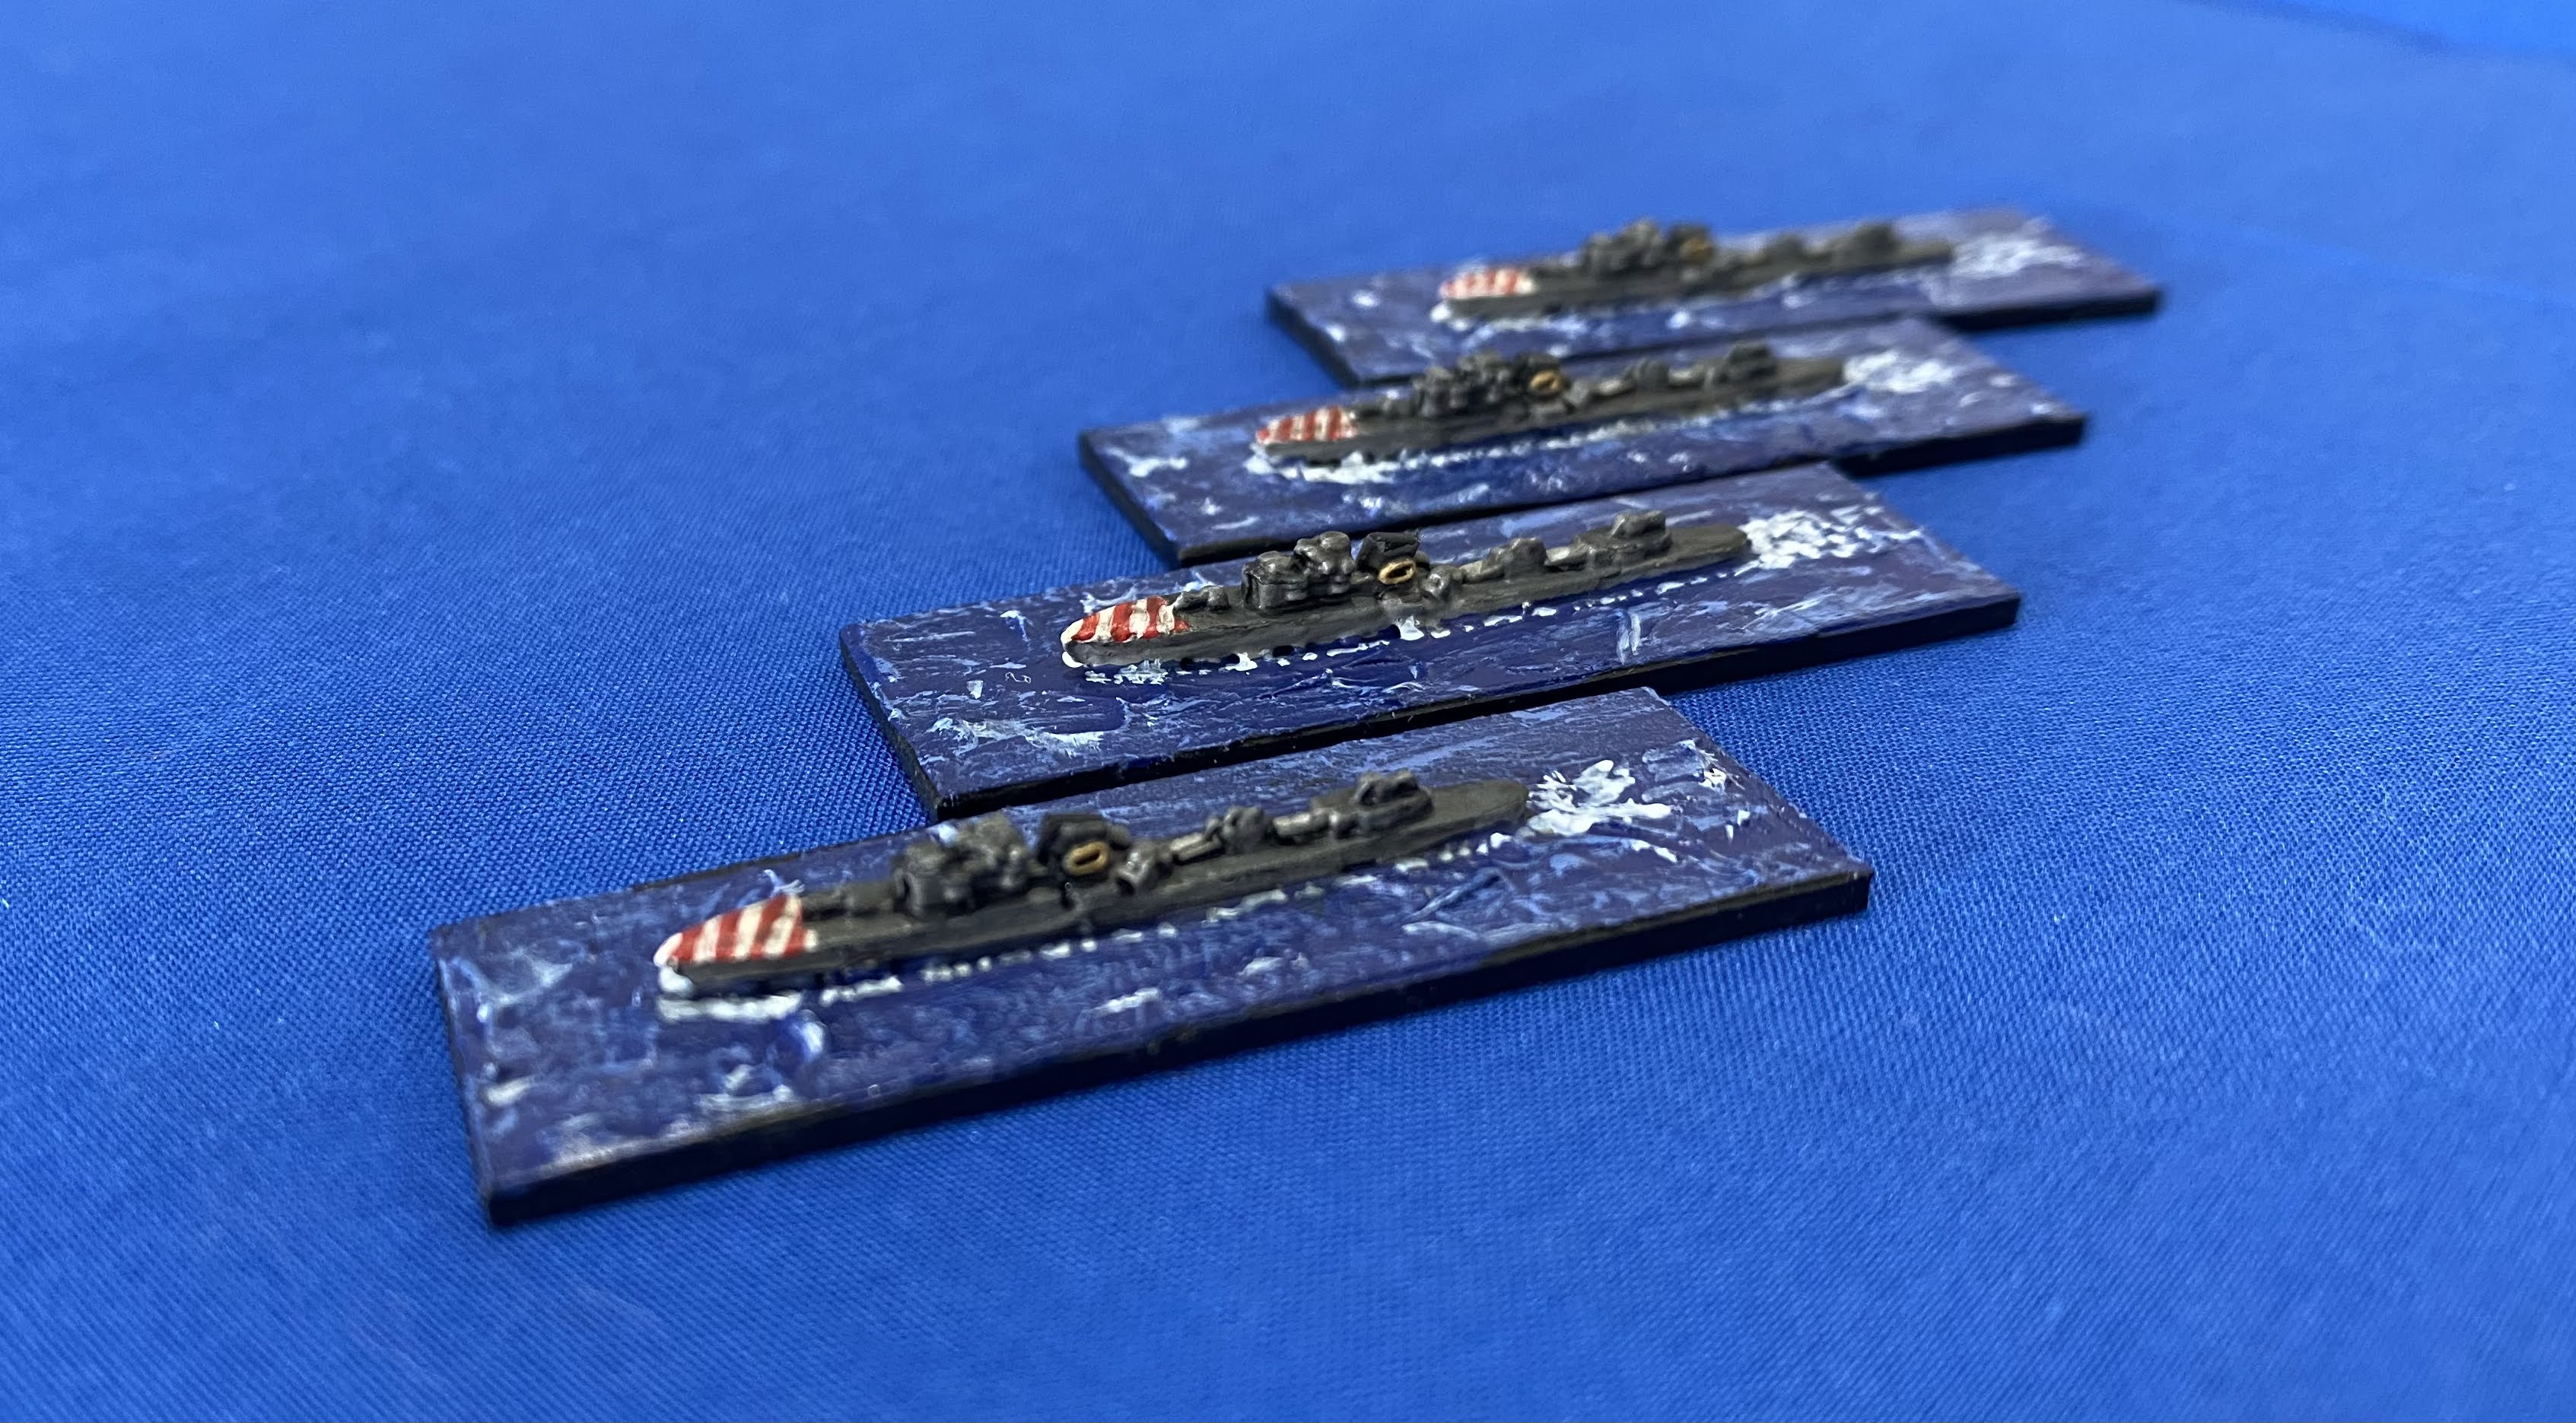
As to destroyers I have initially focussed on four, all from the 9th Flotilla and also engaged at Matapan. They are Alfredo Oriano, Vincenzo Gioberti, Vittorio Alfieri and Giosue Carducci. Now, at 1/3000th scale the models are relatively small. Despite that there is some interesting detail, including a life raft modelled on the the funnel.
As to their service, they were all completed in 1937. Vittorio Alfieri and Giosue Carducci were lost at Matapan. Vincenzo Gioberti was lost in 1943 while Alfredo Oriano was taken over by the French after the war where she served until 1954.
Now, where would we be however, without a group photo. The initial elements of the Regia Marina ready to sortie.
With the first batch of Italian ships completed, excluding the labels, I now need to select some British ships to oppose them…